 Accessories
 Baby & Kids
 Blankets & Afghans
 Clothing
How to Crochet a Simple Blanket
This guide shows how to crochet a simple blanket from one foundation chain and one repeated row of half double crochet, with no shaping, seams, or color changes to manage.
 Nicole Sinclair
Published · Updated · 20 min read
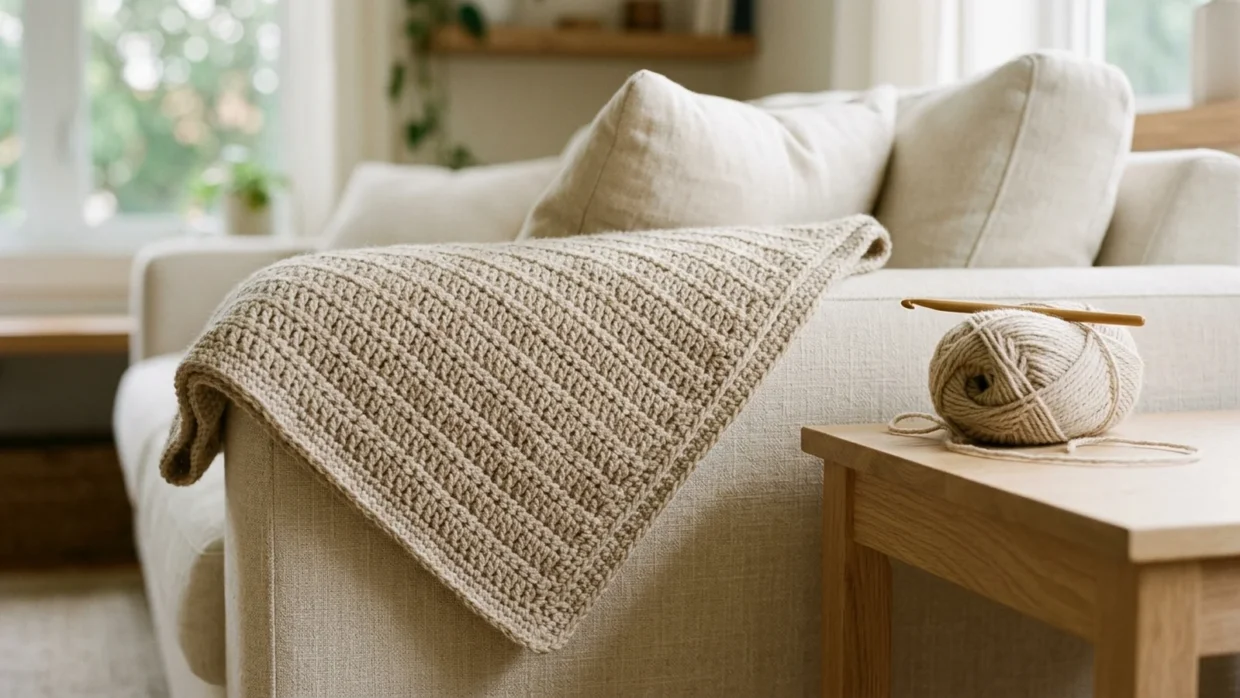
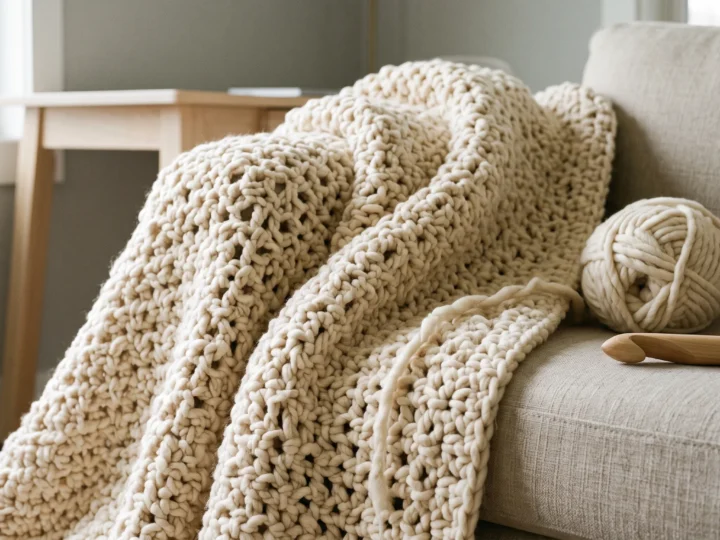
A finished half double crochet throw in soft oatmeal worsted yarn with a single crochet border, draped over the arm of a linen sofa
Pattern at a Glance
- Skill level
- Beginner
- Yarn weight
- Worsted (#4)
- Hook size
- 6 mm (US J-10)
- Finished size
- About 40 × 50 in before border
- Yarn needed
- About 1,700 yd (estimate)
- Construction
- Worked flat in rows, plain rectangle
- Stitches
- Chain, half double crochet (border: slip stitch, single crochet)
- Gauge
- 12 sts × 9 rows = 4 in in hdc
- Pattern type
- Written tutorial
- Project type
- Blanket
Learning how to crochet a simple blanket mostly comes down to a few decisions made before you start and one row that you repeat until the blanket is long enough. The decisions are yarn, hook, width, and stitch. The row is identical every time, which is what keeps this project manageable for a beginner, and also why a small counting mistake can quietly spread across dozens of rows.
The version below is a throw of about 40 × 50 in (roughly 102 × 127 cm) worked flat in half double crochet, with an optional single crochet border. Every number is written so that you can change the size later without redoing the math from scratch.
How to Crochet a Simple Blanket: The Process at a Glance
Here is the whole project in five stages. The rest of the article expands each one, and the full row-by-row instructions are in the pattern section.
- Plan. Choose a worsted-weight yarn, a 6 mm (US J-10) hook, and a finished size, then crochet a small gauge swatch.
- Foundation. Chain the number of stitches you need plus 2 (122 chains for the 40 in throw).
- Repeat. Work half double crochet in every stitch, turn, chain 2, and repeat that one row until the blanket reaches the length you want (112 rows for the sample throw).
- Edge control. Count your stitches after the first few rows, then every 10 rows, and compare the width with the foundation edge.
- Finish. Add a border if you want one, weave in the ends, and wash or block according to your yarn label.
Is This an Easy Crochet Blanket for Beginners?
I would call it beginner-appropriate, and I want to be specific about why, because ‘easy’ can mean several different things. This blanket is simple for structural reasons. The body uses two stitches: chain and half double crochet. The optional border adds slip stitch and single crochet. The shape is a plain rectangle with no increases, no decreases, no seams, no separate pieces, no color changes, and no stitch pattern to memorize. Every row after the first is identical.
That does not make it the easiest possible blanket. A single crochet blanket has even simpler stitch mechanics, and a small square is quicker to finish than a throw. This pattern makes a specific trade: slightly more stitch mechanics than single crochet in exchange for faster progress and a fabric with more drape.
These are the skills you will actually use:
- Making a slip knot and holding the hook and yarn so your tension stays fairly even.
- Chaining evenly, 122 times in a row.
- Working a half double crochet: yarn over, insert, pull up a loop, yarn over, and pull through three loops.
- Turning at the end of a row and chaining 2 without counting it as a stitch.
- Finding the first and last stitch of every row.
- Counting to 120 and noticing when the row is off.
The demanding part is length, not technique. Row 1 alone is 120 stitches, and the full throw contains more than 13,000 half double crochet stitches (120 stitches × 112 rows = 13,440). The challenge is staying accurate and patient through a lot of repetition. If that number feels heavy, use the lap size in the sizing table below. The method is identical with 90 stitches per row.
Why This Blanket Uses Half Double Crochet
Stitch choice affects speed, fabric thickness, and, most relevant to a beginner, how many decisions you make at the edges. These are the three stitches most often used for a plain blanket:
| Stitch | Fabric | Usual turning chain | Trade-off |
|---|---|---|---|
| Single crochet (sc) | Dense and firm | Ch 1, normally not counted | Simplest mechanics, but the slowest to cover an area and generally the stiffest fabric |
| Half double crochet (hdc) | Medium density with a little texture | Ch 2, not counted in this pattern | A middle ground: faster than sc, with the same turn-and-work-in-the-first-stitch routine |
| Double crochet (dc) | Taller, more open, and drapey | Ch 3, usually counted as the first stitch | Fastest, but the counted turning chain makes edge stitch placement easier to get wrong |
I would choose half double crochet for a first blanket because it covers ground noticeably faster than single crochet without adding the counted turning chain that trips people up with double crochet. If you would rather have a firmer fabric and do not mind a slower pace, single crochet follows the same method. For a wider comparison of options, see the guide to the best crochet stitch for a blanket.
One point about the turning chain matters more than the stitch you choose. Some patterns count the ch 2 as the first half double crochet. This one does not. The trade-off is that the edge can look slightly looser than it would with a counted chain, and the border covers that. Using a single rule for the whole blanket is more important than which rule you pick, because mixing the two changes your stitch count.
Materials and Yarn Choices
The pattern is written for worsted-weight (#4) yarn and a 6 mm (US J-10) hook. Worsted yarn is typically crocheted with hooks in roughly the 5.5–6.5 mm (US I-9 to K-10½) range, so 6 mm sits comfortably inside it and gives a blanket that drapes rather than stands stiff. No specific brand is required. The sample blanket is worked in a smooth, solid, light-colored yarn (oatmeal), which is an example rather than a requirement.
| Item | What to use | Notes |
|---|---|---|
| Yarn | Worsted weight (#4), smooth, solid, light color. About 1,700 yd for the 40 × 50 in throw | The yardage is an estimate; see the sizing table |
| Hook | 6 mm (US J-10) | Use whichever style you can hold comfortably for long sessions |
| Stitch markers | At least 6 removable markers, or short pieces of scrap yarn | For counting the foundation chain and marking every 10th row |
| Tapestry needle | Blunt tip with a large eye | For weaving in ends |
| Scissors | Any small pair | |
| Measuring tape | Flexible tape | For checking gauge, width, and length |
Choosing a fiber
| Fiber | What to expect | Watch for |
|---|---|---|
| Acrylic | Usually budget-friendly, sold in many colors, and often labeled machine washable | Can feel less breathable and may pill over time; direct heat can permanently alter it |
| Cotton | Firmer with less stretch, so stitches look crisp; a cooler feel | A noticeably heavier blanket at this size, and uneven tension shows more |
| Wool or wool blend | Warm and springy with good stitch recovery | Care varies; check whether the label says machine washable (superwash) or hand wash |
For a first blanket I would choose a smooth acrylic or acrylic blend in a light solid color. The reasons are practical: it is easy to wash, and you can see the tops of the stitches clearly, which matters when you are learning to find the first and last stitch of each row. Dark or fuzzy yarn hides those stitches. That is a judgment for a first project, not a rule.
Buy all your yarn at once and check that the skeins share a dye lot number. Skeins from different lots can differ slightly in color, and in a blanket that difference can show up as a band across the fabric.
If you want to substitute a different yarn, stay in the worsted weight and swatch it before committing. A lighter yarn needs many more stitches and much more yarn for the same size, and a bulkier yarn with a larger hook needs fewer. Recalculate from your own gauge using the sizing formula below. The 1,700 yd figure only applies to worsted yarn at about this gauge.
Planning Your Blanket: Size, Gauge, and Yarn Amount
Choose a finished size
The pattern is written for a throw, but the numbers for two other sizes are below. All of them use the same gauge (12 stitches and 9 rows in 4 in) and the same row. Dimensions are for the body before any border is added.
| Size | Finished body | Foundation chain | Stitches per row | Rows | Yarn to buy (estimate) |
|---|---|---|---|---|---|
| Lap | 30 × 40 in (76 × 102 cm) | 92 | 90 | 90 | About 1,000 yd |
| Throw (the sample) | 40 × 50 in (102 × 127 cm) | 122 | 120 | 112 | About 1,700 yd |
| Large throw | 50 × 60 in (127 × 152 cm) | 152 | 150 | 135 | About 2,500 yd |
I calculated the yardage from stitch counts and typical yarn use per half double crochet stitch. I did not measure it from a finished blanket, and it includes a cushion for the border, the tails, and differences in tension. Your swatch is a better guide than my table, as described below.
Crochet a gauge swatch
A swatch tells you what size your blanket will actually be and how much yarn it needs. This one is about 5 in square:
- Ch 17.
- Row 1: Hdc in the 3rd ch from hook and in each ch across. Turn. (15 sts)
- Rows 2–11: Ch 2 (does not count as a stitch), hdc in each st across. Turn. (15 sts)
- Fasten off.
Lay the swatch flat without stretching it. Measure across the middle, ignoring the first and last stitch of each row, and count the stitches and rows in 4 in (10 cm). The pattern is designed around 12 stitches and 9 rows in 4 in. That figure is the target this pattern is written to, not a measurement from a specific yarn, so your own swatch is what counts.
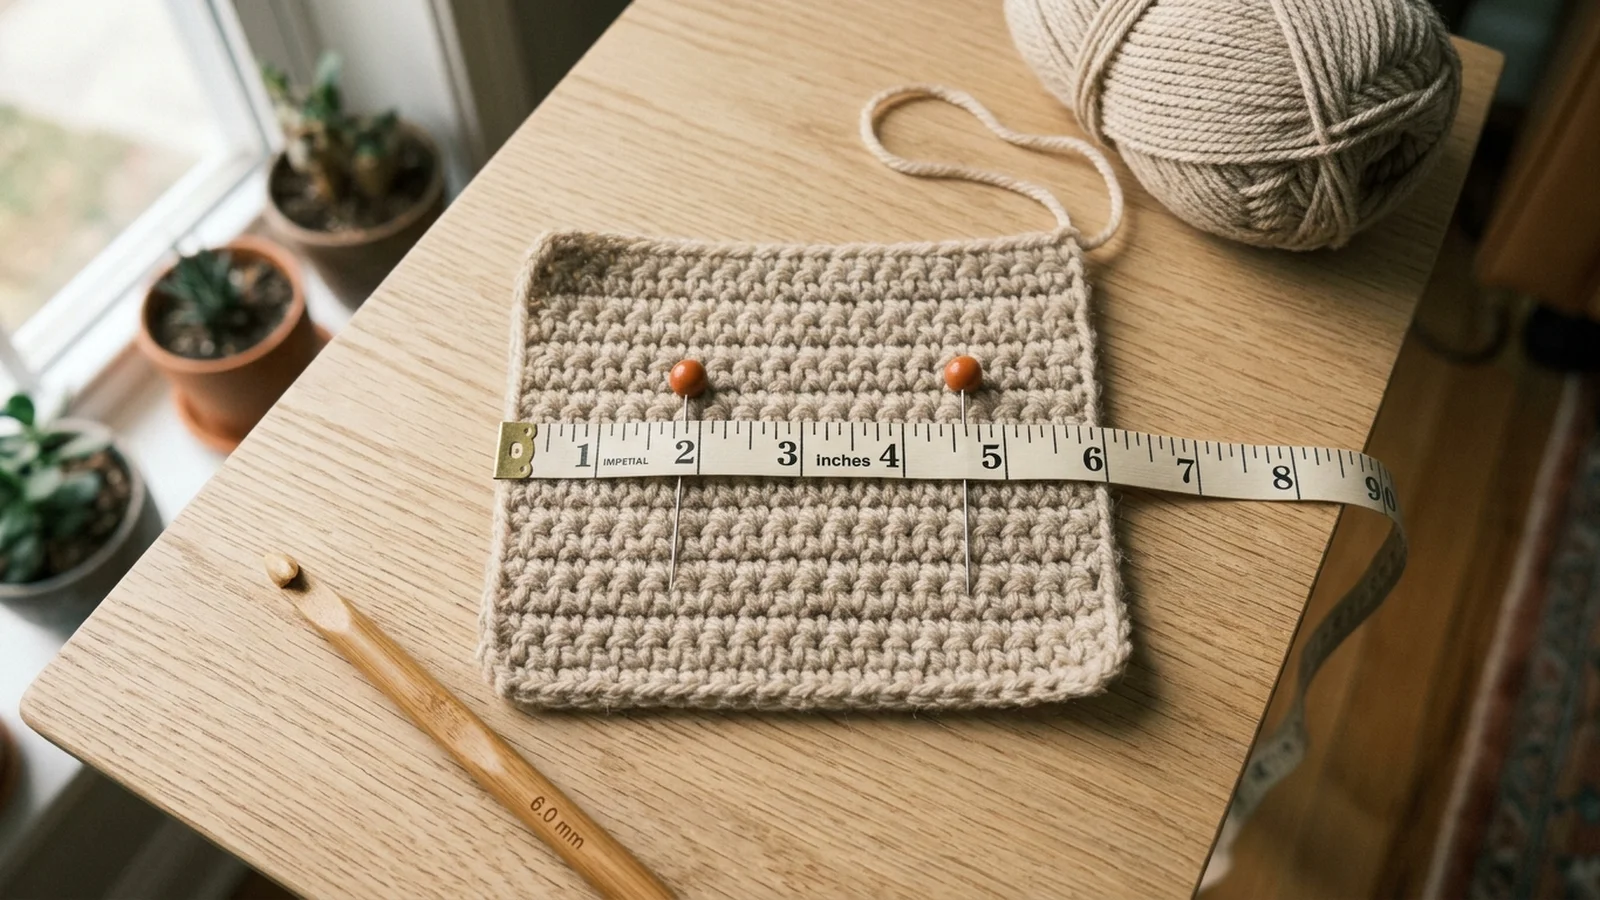
For a blanket, gauge is not critical the way it is for a sweater. A different gauge mostly changes the finished dimensions, not whether the blanket works. At 11 stitches in 4 in, 120 stitches would measure about 43.6 in wide. At 13 stitches in 4 in, the same 120 stitches would measure about 36.9 in. You have three options: accept the different size, change your hook by a half size and swatch again, or recalculate the stitch count (see the formula below).
Feel the fabric as well as measuring it. If the swatch feels stiff like a board, the hook is probably too small for the yarn. If it looks full of holes, go down a size.
To customize the width, use this formula: stitches = desired width in inches × stitches per inch, and the foundation chain = stitches + 2. At the pattern gauge of 3 stitches per inch, a 36 in wide blanket needs 108 stitches and a foundation chain of 110. For length, rows = desired length in inches × rows per inch. At 2.25 rows per inch, a 45 in length is about 101 rows. Half double crochet has no stitch multiple, so any stitch count works.
Estimate how much yarn to buy
Once you have a swatch, you can estimate yardage yourself. The 40 × 50 in throw covers 2,000 square inches, and your 5 in swatch covers about 25, so the blanket is roughly 80 times the size of the swatch. Weigh the swatch, multiply by 80, and convert to yardage using the weight and length printed on your yarn label. Then add a cushion for the border, the tails, and the chance that your tension changes over a long project. If you want to work out yardage for a different yarn weight or size, read how much yarn for a crochet blanket before you buy.
Abbreviations and Stitches
This pattern uses US crochet terminology throughout. If you follow UK patterns, the names differ for two of these stitches, and mixing them up will change the fabric.
| Abbreviation | US term | UK equivalent |
|---|---|---|
| ch | chain | chain |
| sl st | slip stitch | slip stitch |
| sc | single crochet | double crochet (dc) |
| hdc | half double crochet | half treble crochet (htr) |
| yo | yarn over | yarn round hook (yrh) |
| st(s) | stitch(es) | stitch(es) |
How to work a half double crochet
- Yarn over (wrap the yarn from back to front over the hook).
- Insert the hook into the stitch. In rows after Row 1, go under both top loops (the V that faces you). In Row 1, go under the top loop of the chain.
- Yarn over and pull a loop back through the stitch. There are now three loops on the hook.
- Yarn over and pull through all three loops at once. One loop remains on the hook, and one hdc is complete.
The pull-through on step 4 is where stitches tend to tighten. If it feels tight, let the loops sit a little looser on the hook when you pull up in step 3. Both stitches below are only needed if you add the border.
- Single crochet (sc): Insert the hook into the stitch, yarn over, pull up a loop (two loops on the hook), yarn over, and pull through both loops.
- Slip stitch (sl st): Insert the hook into the stitch, yarn over, and pull through both the stitch and the loop on the hook.
Simple Blanket Crochet Pattern: Step by Step
Pattern notes
- The sample throw is about 40 × 50 in (102 × 127 cm) before the border.
- The ch 2 at the start of each row does not count as a stitch. Do not work into it at the end of the following row.
- Work each hdc under both loops at the top of the stitch (the V that faces you).
- The stitch count appears in parentheses at the end of each row or round. Chains at the start of a row are not included.
- The blanket is worked flat, turning at the end of each row. Either side can be the front.
- Required: the foundation chain and the body. Optional: the border rounds.
Foundation chain
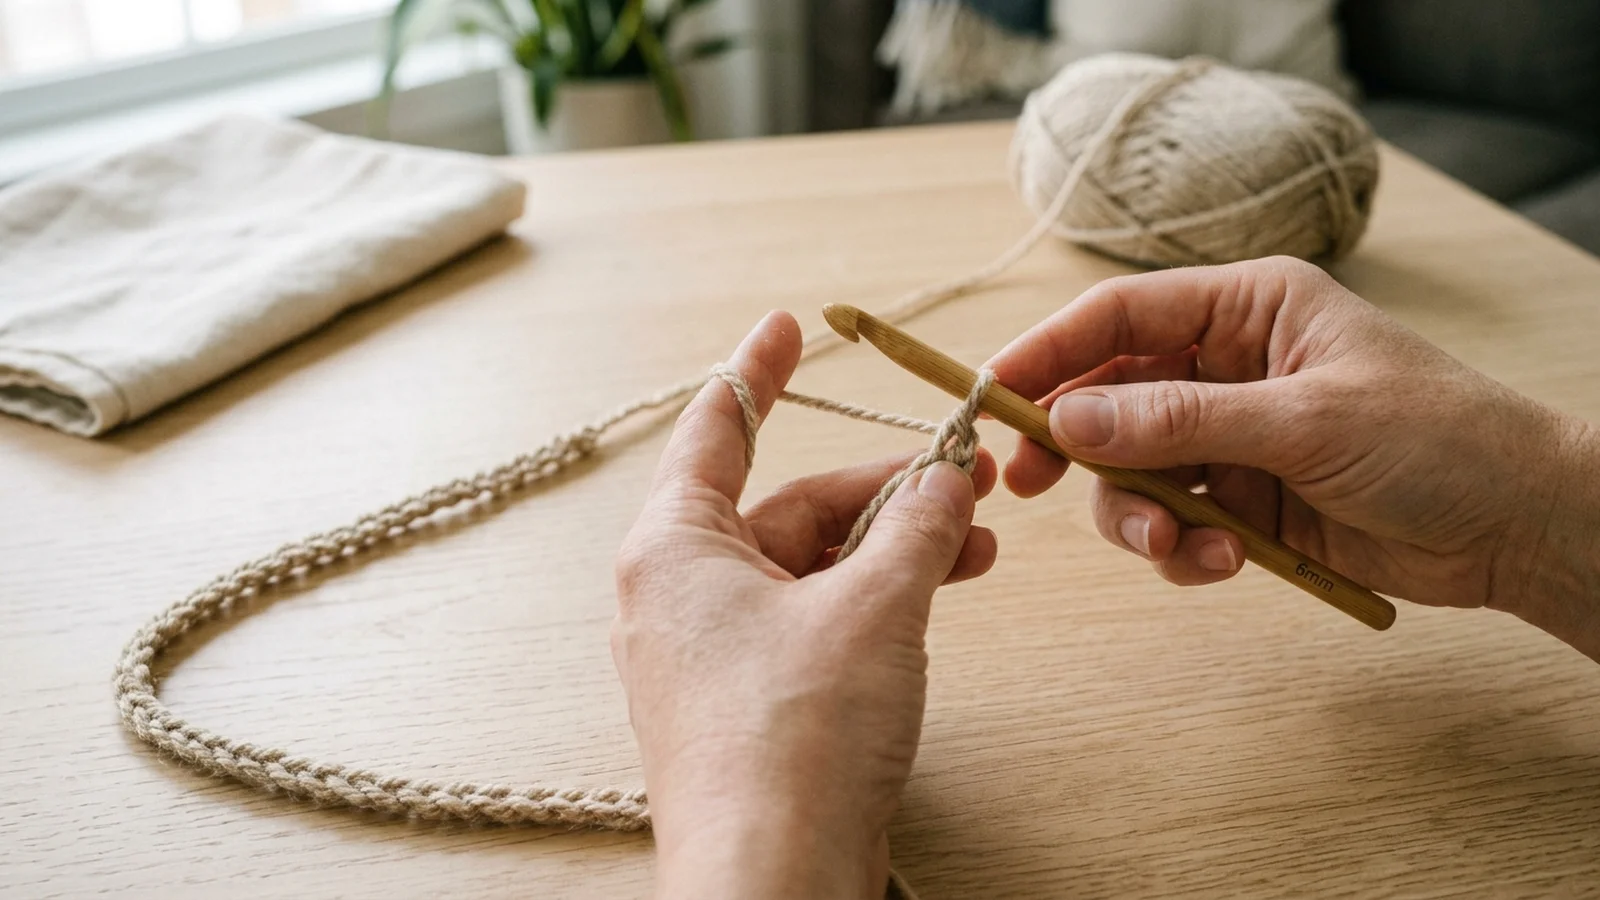
Foundation: Ch 122. (122 ch)
Chain loosely. The foundation edge is the one place where tight tension cannot be fixed later, and a chain that is too snug will pull the bottom of the blanket narrower than the top. Do not count the slip knot or the loop on the hook. To keep count without starting over, clip a removable marker through every 20th chain: after chain 20, 40, 60, 80, 100, and 120, and then work two more chains. When the chain is done, lay it flat and relaxed. It should measure roughly 40 in. If it is much shorter, the chain is tighter than your stitches will be.
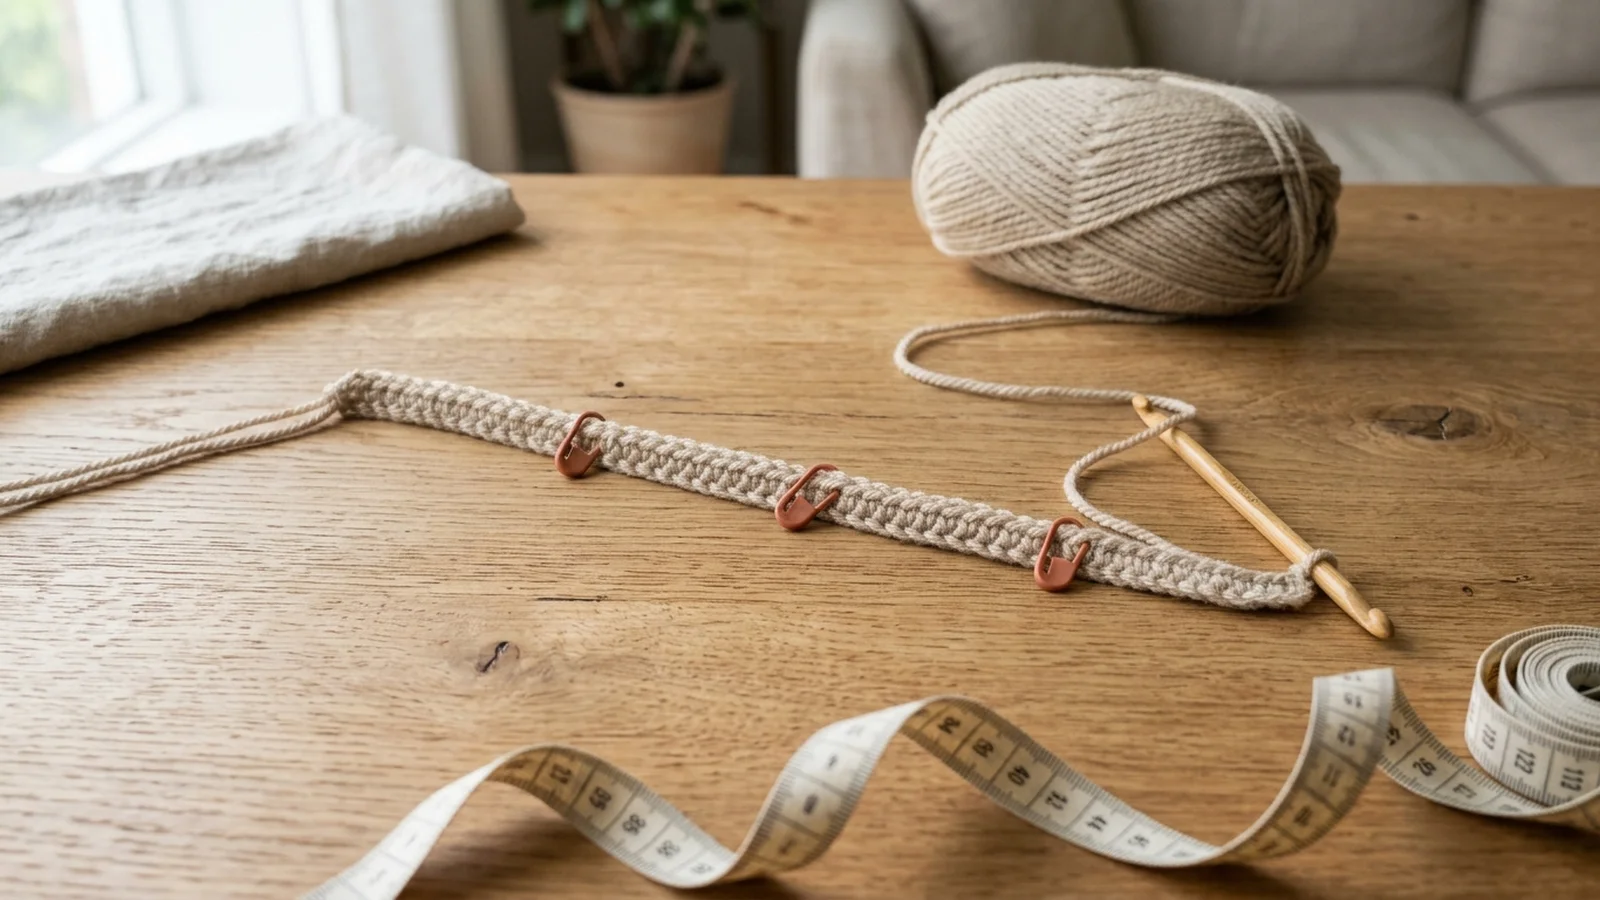
Row 1: working into the chain
Row 1: Hdc in the 3rd ch from hook (the 2 skipped chains do not count as a stitch), then hdc in each remaining ch across. Turn. (120 sts)
The two chains you skip do the job of a turning chain for this row. Take out your markers as you reach them. When you finish, count the stitches before turning. This is the most important count of the whole project: 120 stitches in Row 1 means every row afterward has a target to match. If you have 119 or 121, pull back to the point where the count went wrong. Redoing part of one row is much quicker than fixing the edge of a finished blanket.
Row 2 and the repeat
Row 2: Ch 2 (does not count as a stitch). Hdc in the first st (the stitch right beside the chain), then hdc in each st across, working the last hdc into the top of the last stitch, not into the turning chain of the row below. Turn. (120 sts)
Rows 3–112: Repeat Row 2. (120 sts each row)
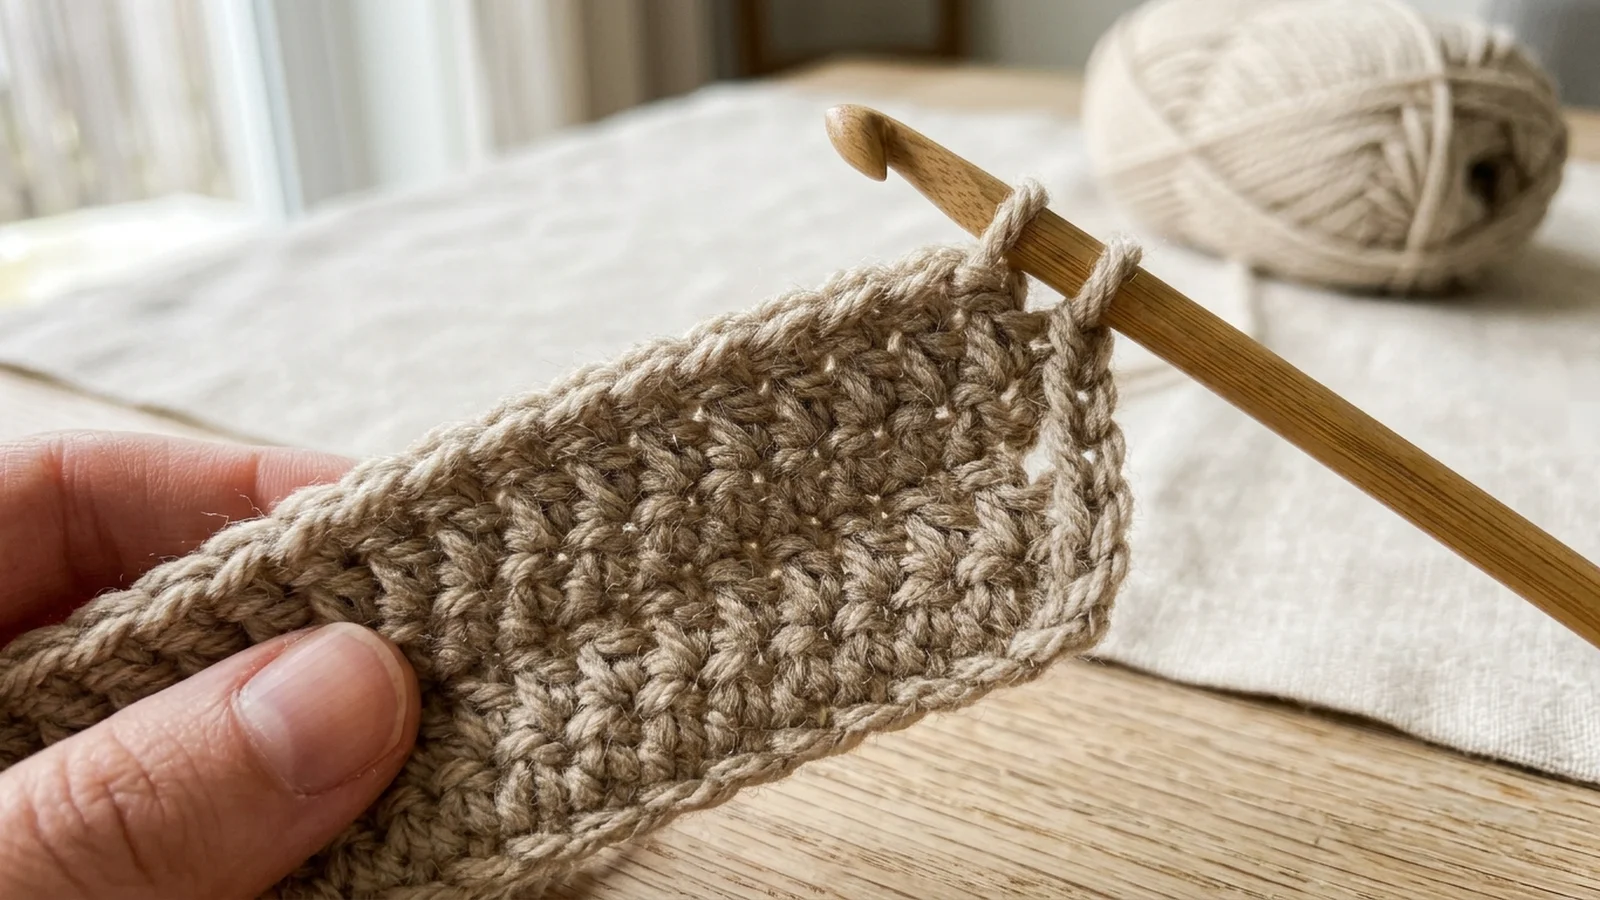
At 9 rows in 4 in, 112 rows measures about 49.8 in, close to the 50 in target. Because every row is the same, you can stop at any row you like. Lay the blanket flat, without stretching, and measure it. If it is short, keep going. If you want it longer or shorter, the row count is the only thing that changes.
Place a removable marker in the first stitch of every 10th row (rows 10, 20, 30, and so on). It costs you a few seconds each time, and it saves you from counting 100 rows down the side later.
Border (optional)
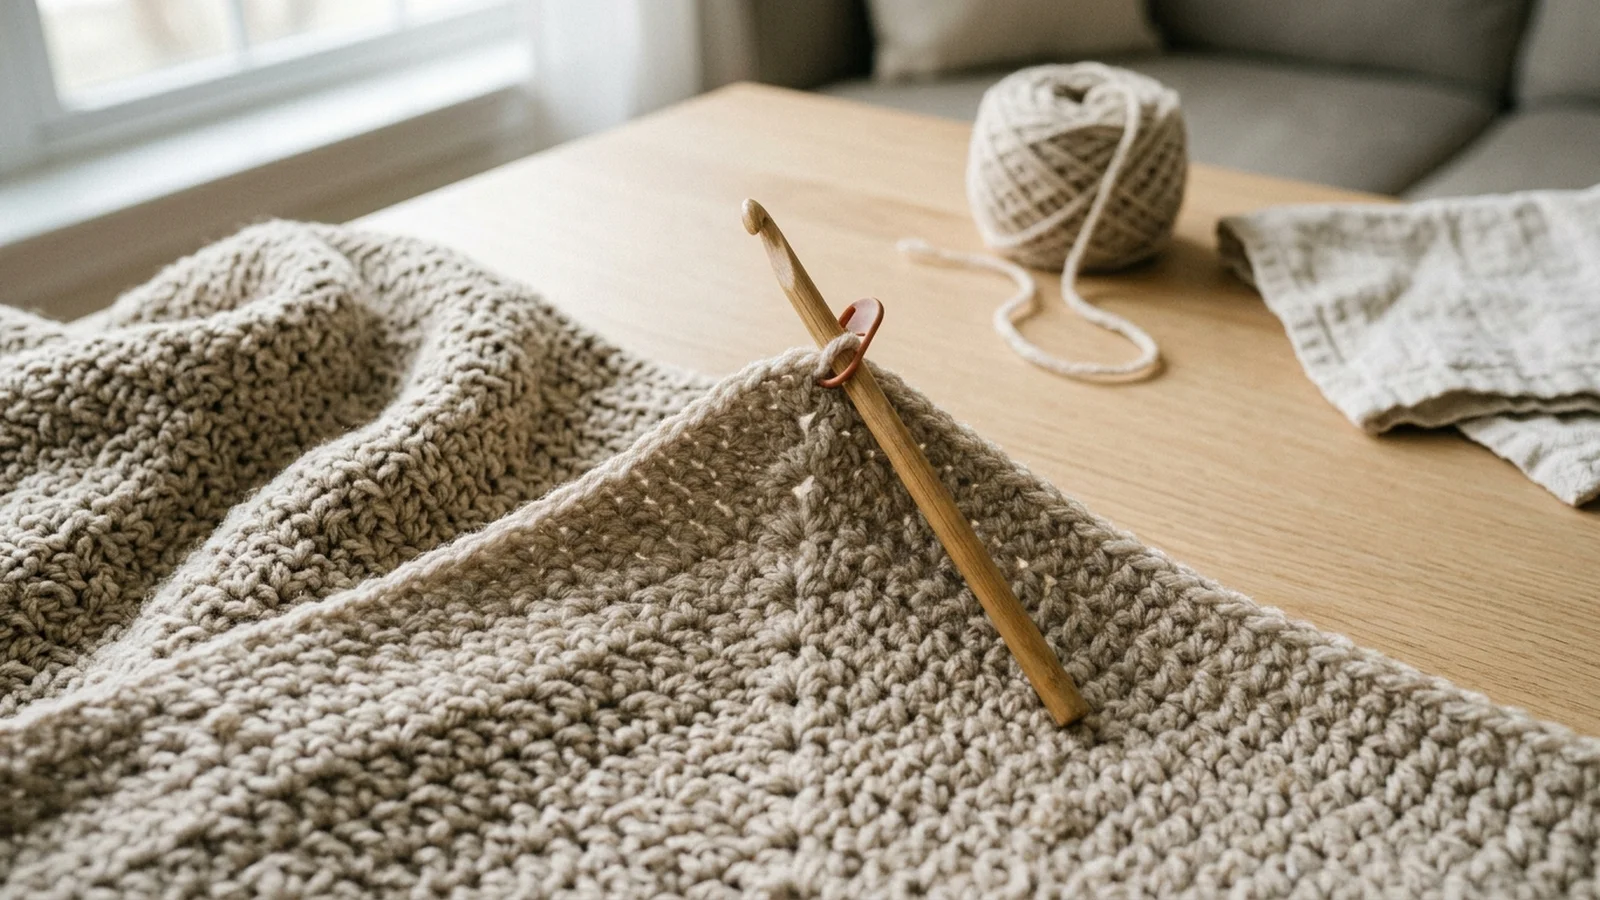
Fasten off after Row 112. The border is optional, but I would add at least Round 1. The ends of half double crochet rows tend to look uneven on their own, and a single round of single crochet makes the edge look deliberate and firms it up. Join yarn at a corner stitch and pick whichever side you prefer as the front.
Border Round 1: Join yarn with a sl st in a corner stitch of the last row. Ch 1 (does not count as a stitch). 3 sc in the same st (corner). Sc in each of the next 118 sts across the last row. 3 sc in the corner st. Sc evenly down the side, working about 1 sc in each row end (112 sc). 3 sc in the first st of the foundation edge (corner). Sc in each of the next 118 sts across the foundation edge. 3 sc in the last st of the foundation edge (corner). Sc evenly up the last side, again about 1 sc per row end (112 sc). Join with a sl st to the first sc. (472 sts)
Beside the corner where you started Row 1, the two chains you skipped will sit just outside the last stitch. Ignore them and work the corner into the base of that last stitch. Row ends are never an exact match for stitches, so a difference of a few sc on a long side is fine. If the edge starts to ruffle, you are working too many sc per row end. If it puckers, you are working too few.
Border Round 2 (optional): Do not turn. Ch 1 (does not count as a stitch). Sc in the same st as the join. Continue around, working 1 sc in each st and 3 sc in the middle st of each 3-sc corner group. Join with a sl st to the first sc. (480 sts)
Fasten off: Cut the yarn, leaving a tail of about 6 in, and pull the tail through the loop. Each additional sc round with 3-stitch corners adds 8 stitches to the count.
Keeping the Edges Straight
The blanket should be the same width at Row 112 as it was at Row 1. When it is not, the cause is almost always at one of the two edges, and it is far easier to catch at row 5 than at row 50.
Checks worth doing
- Count the stitches in Rows 1, 2, and 3. After that, count whenever the edge looks off, and at least every 10 rows.
- Measure the width with the blanket laid flat and unstretched, and compare it with the foundation edge.
- If the count is wrong, place markers every 20 stitches on the row below and count between them to isolate the section where the stitch went missing.
- Look at the row in front of you before you begin the next one. The first and last stitch are the two you must not skip.
Where the first and last stitches go
The first hdc goes into the stitch right beside the ch 2, not into the chain itself and not into the second stitch. The last hdc goes into the top of the last stitch of the row below. The turning chain from that row sits next to it like a tiny braid at the edge. It looks like a stitch, but it is not one, and working into it adds a stitch to that row. Get in the habit of finding that last stitch by eye before you reach it, not by feel.
Finishing, Blocking, and Care
Weave in the ends. Thread the tail on a tapestry needle and weave it through the backs of the stitches along the edge in one direction for about 2 in. Then weave back in the opposite direction, and trim the end close to the fabric without pulling it tight. Weaving in two directions keeps the end from working loose in the wash.
Blocking is optional. It can smooth mild edge wobble, and it is most useful for wool and cotton. For acrylic, avoid steam and direct heat because they can permanently change the fibers. If your blanket needs shaping, gentle wet blocking is safer: soak it, press the water out without wringing, and lay it flat and square to dry. Always follow your yarn label.
Care depends on the fiber. Follow the instructions on your yarn label, since they vary by brand and fiber. Take a photo of the label before you throw it away, because you will not remember the instructions when the blanket is finished. Wash gently, and dry flat or on low heat only if the label allows it.
Customizing the Simple Blanket
Color
Stripes are the easiest way to add color without changing the stitch. To change color, complete the last hdc of a row with the new yarn: on the final pull-through of the last stitch, pull the new color through the three loops. Wide stripes are best cut and woven in later. For narrow stripes, you can carry the unused yarn loosely up the edge, but a tight carry pulls the edge in. Either way, stripes add ends to weave in.
Border
A border in a contrasting color makes the blanket look more finished and takes only a few minutes per round. Use the same rule as above: 3 sc in each corner stitch, and expect the round to grow by 8 stitches each time.
Size
Use the sizing formula above to recalculate the foundation chain and row count. Yarn needs scale with area, so doubling the width and length roughly quadruples the yarn.
Yarn substitutions
Within worsted weight, swatch again and expect the fabric to behave differently. An acrylic swatch will drape and stretch more than cotton, for example, and a cotton blanket at this size will be noticeably heavier. If you change the yarn weight, treat the pattern as a template: recalculate the stitch count and yarn needs from your own swatch.
Troubleshooting a Simple Crochet Blanket
Uneven or tight foundation chain
The signs are chain loops of different sizes, a hook that struggles to enter some of them, and a bottom edge that is narrower than the rest. The cheapest fix is early: if you notice while working Row 1, pull the row back and, if necessary, redo the chain. If you have already worked several rows, you cannot fix the chain without redoing them, so a border and gentle blocking will help the edge look more even. For the next blanket, try making the chain with a hook one size larger (6.5 mm, US K-10½) and switching back to your 6 mm hook for Row 1. A foundation half double crochet, which builds the chain and the first row together, is another option once you are comfortable with the basic stitch.
Added or missed stitches
You will usually notice one of these: a row that ends with something other than 120 stitches, a visible gap, a stitch that looks doubled, or an edge that no longer lines up. Count the row below, then count the row you just made, and use your markers to find the section where the two disagree. If the mistake is only a few rows down, I would pull the rows back to it. That is a few minutes of work. If you notice a single-stitch error much later, you can absorb it: skip one stitch in the middle of a row to lose one, or work 2 hdc into one stitch to gain one. It will be visible up close but will not affect how the blanket works.
Edges widening or narrowing
| What you see | Likely cause | Fix |
|---|---|---|
| The blanket gradually gets wider and rows have more than 120 stitches | Working into the ch 2 as well as the last stitch, or working two hdc into the first stitch | Find the last row that had 120 stitches and redo from there; skip the turning chain at the end of each row |
| The blanket gradually gets narrower and rows have fewer than 120 stitches | Skipping the first stitch (working into the second) or missing the last stitch | Identify the first and last stitch before each row; place a marker in the last stitch if you need a reminder |
| The edges are wavy but the count is correct | Tension changes at the turns (too tight or too loose) | Relax the first stitch after the turning chain; gentle blocking can improve mild waviness |
Turning-chain confusion
The rule for this pattern is short: the ch 2 does not count, the first hdc goes into the stitch directly beside it, and the last hdc goes into the top of the last stitch, not the turning chain of the previous row. If you switch between patterns that count the turning chain and ones that do not, write the rule for the current pattern at the top of your notes, because mixing them is the most common reason the count drifts.
Frequently Asked Questions
What is the easiest crochet stitch for a blanket?
It depends on what you mean by easiest. Single crochet has the fewest steps per stitch and no tall stitches to manage, so many beginners find it the most forgiving. The trade-off is a denser fabric and more rows to reach the same length. Half double crochet, used here, works faster while keeping the same turn-and-start routine, and double crochet is faster still but its turning chain is usually counted as a stitch.
How many chains should a beginner start with?
For this pattern, the number of stitches you want plus 2. At 3 stitches per inch, a 40 in blanket needs 122 chains and a 30 in blanket needs 92. If you want a low-stakes start, chain 17 for the gauge swatch first. It practices the same first row with 15 stitches.
How can a simple blanket be resized?
Change two numbers: the foundation chain for width and the row count for length. Multiply your desired width in inches by your stitches per inch and add 2 for the chain. Multiply your desired length in inches by your rows per inch for the row count. Half double crochet has no stitch multiple, so any count works. For the border, Round 1 equals 2 × (stitches − 2) + 2 × rows + 12.

Last updated . Found something out of date? Let us know.