 Accessories
 Baby & Kids
 Blankets & Afghans
 Clothing
Crochet Baby Bonnet Pattern: A Pixie Hood in Three Sizes
This crochet baby bonnet pattern makes a pixie-style hood from one flat rectangle. You work it in half double crochet, fold it, seam the top, and finish the face and neck opening with a stretchy ribbed edge.
 Nicole Sinclair
Published · Updated · 11 min read
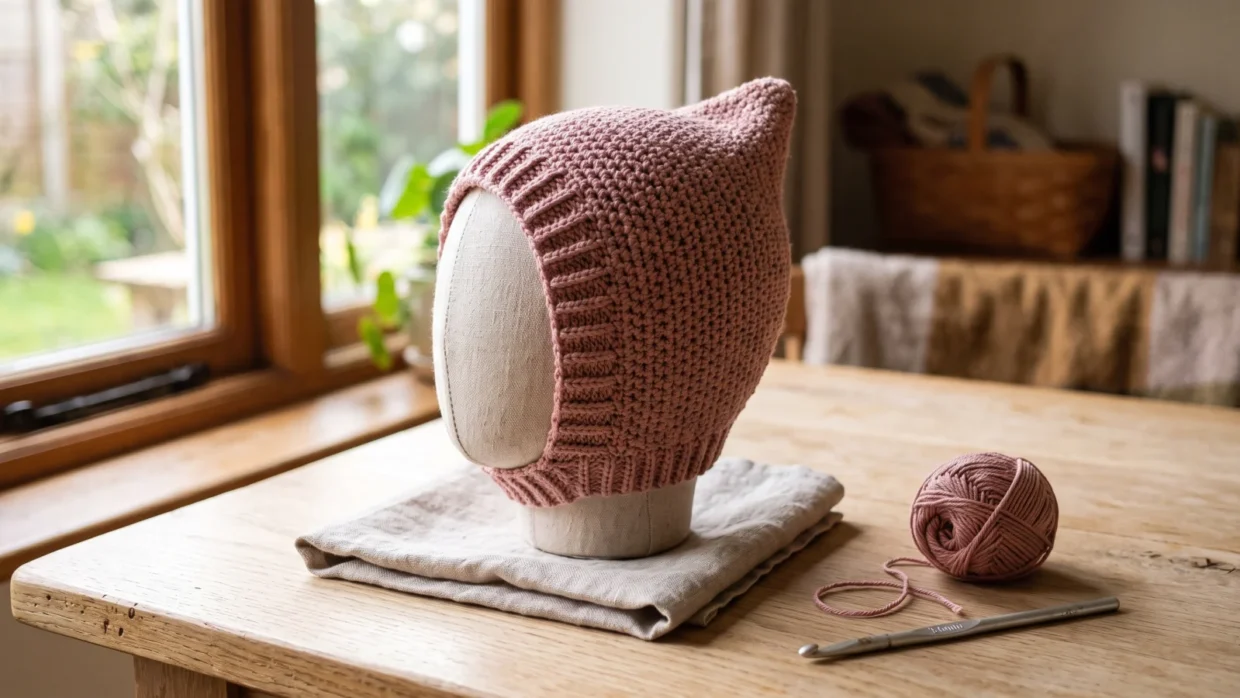
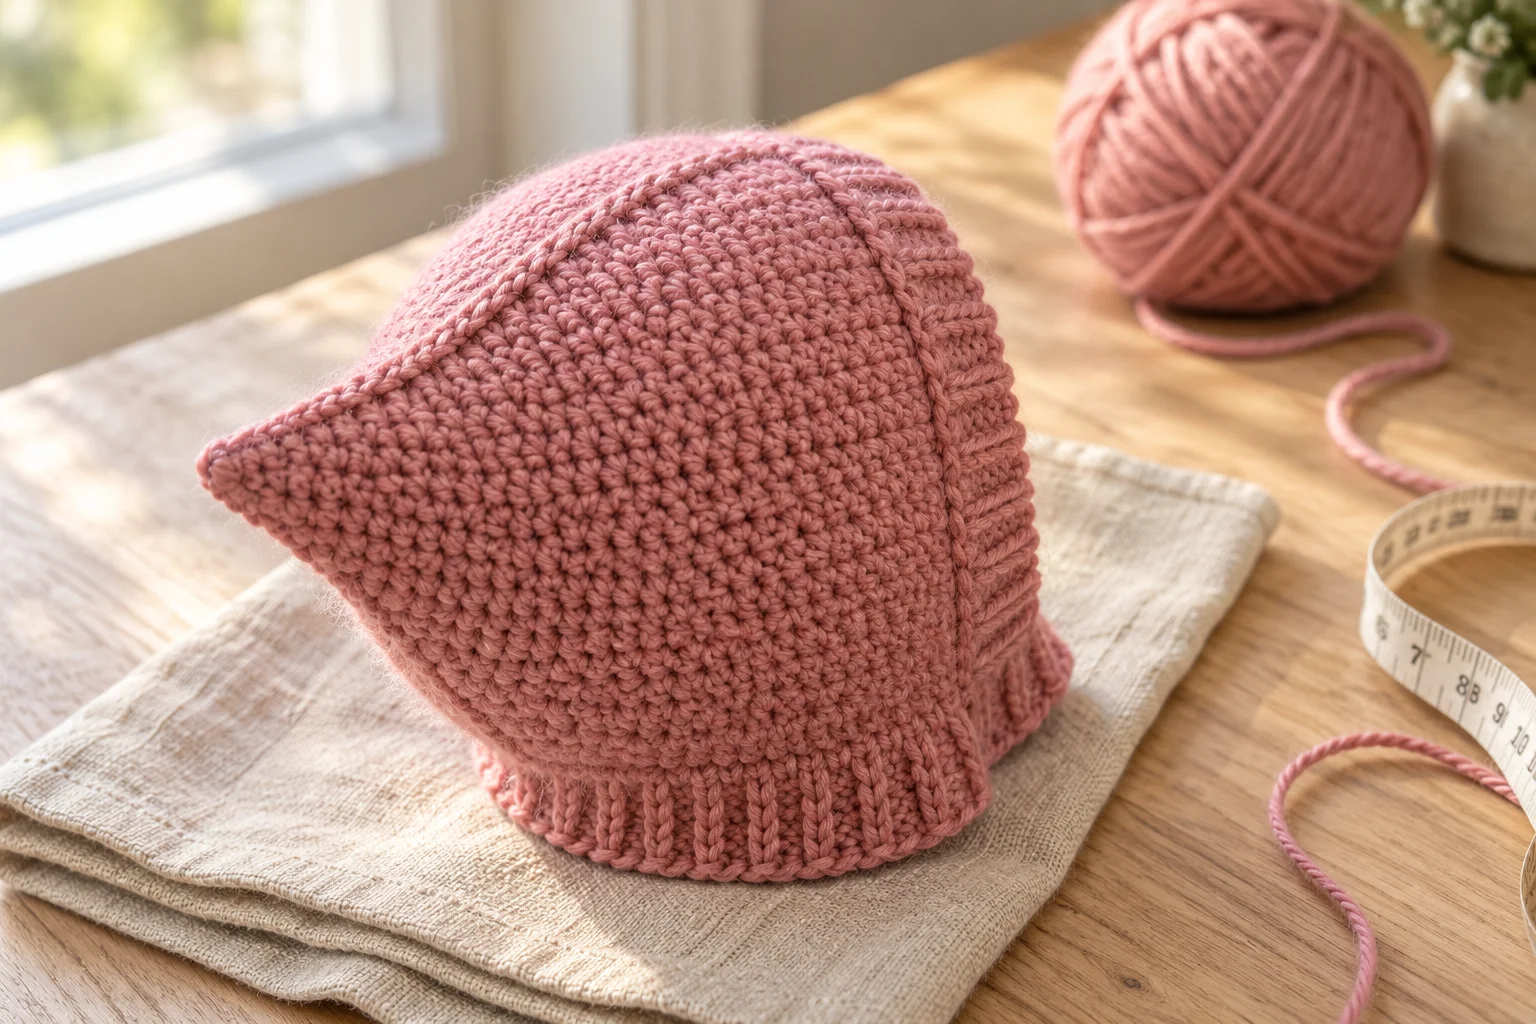
A finished dusty rose crochet baby bonnet on a small head form, with a ribbed edge and a soft point at the back
Pattern at a Glance
- Skill level
- Easy
- Yarn weight
- Light / DK (#3)
- Hook size
- 4.0 mm (G-6) and 3.5 mm (E-4)
- Finished size
- Fits head circumference 17 (18, 19) in
- Yarn needed
- About 210 (235, 265) yd
- Construction
- Worked flat, folded and seamed; ribbed edging worked in the round
- Stitches
- Chain, slip stitch, half double crochet, front post half double crochet, back post half double crochet
- Gauge
- 16 sts and 12 rows = 4 in in hdc
- Pattern type
- Free pattern
- Project type
- Baby bonnet (pixie hood)
The pixie point on this crochet baby bonnet pattern comes from the fold, not from shaping. When you seam the top edge of a folded rectangle, the corner at the fold stands up into a soft point at the back of the head. There are no increases or decreases anywhere, which makes the pattern easy to count, easy to resize and hard to get lost in.
I would call it easy rather than beginner. Half double crochet in rows is simple, but you need to be comfortable working front post and back post stitches and picking up stitches evenly along an edge. Both are explained step by step below.
Pattern at a glance
- Skill level: Easy. The two parts that need attention are counting row ends for the edging and the post stitches in the rib.
- Yarn: light weight (#3), about 210 (235, 265) yd / 192 (215, 242) m.
- Hooks: 4.0 mm (G-6) for the body and 3.5 mm (E-4) for the ribbed edge, or the sizes needed to match gauge.
- Gauge: 16 sts and 12 rows = 4 in (10 cm) in half double crochet with the larger hook.
- Sizes: 6–12 months, 18–24 months, 4 years.
- Construction: one rectangle worked flat, folded and seamed at the top, then a ribbed edging worked in the round. No ties.
Materials and yarn choice
Choose a light (#3) yarn that is soft against the skin and machine washable. Smooth acrylic and acrylic blends are the easiest to care for and show the post stitches clearly. Cotton and cotton blends have less stretch, so the ribbed edge will feel firmer and the bonnet less forgiving if your tension changes. Wool and wool blends are soft and elastic, but many need hand washing, so read the label before you commit. A smooth, tightly plied yarn works better than a fuzzy one, because fuzz hides the ribs and sheds loose fibers.
- Light weight (#3) yarn, about 210 (235, 265) yd. Yardage depends on tension, so these are estimates.
- 4.0 mm (G-6) and 3.5 mm (E-4) crochet hooks
- Yarn needle
- 2 stitch markers
- Scissors and a soft tape measure
Sizing
Measure around the baby’s head just above the eyebrows and ears, then choose the size closest to that number. If the head falls between two sizes, I would make the larger one. The ribbed edge pulls the opening in, and a slightly roomy bonnet is easier to put on than one that sits tight.
| Size | Head circumference | Foundation chain | Sts per row | Rows | Flat piece | Edging sts | Yarn |
|---|---|---|---|---|---|---|---|
| 6–12 months | 17 in (43 cm) | 62 | 60 | 24 | 15 × 8 in (38 × 20 cm) | 108 | 210 yd (192 m) |
| 18–24 months | 18 in (46 cm) | 66 | 64 | 26 | 16 × 8.7 in (40.5 × 22 cm) | 116 | 235 yd (215 m) |
| 4 years | 19 in (48 cm) | 70 | 68 | 28 | 17 × 9.3 in (43 × 23.5 cm) | 124 | 265 yd (242 m) |
The instructions give the smallest size first, with the larger sizes in parentheses. “60 (64, 68) sts” means 60 for the smallest size, 64 for the middle size and 68 for the largest. A single number applies to every size. Highlight your size before you start.
Gauge
Gauge decides whether this bonnet fits. The width of the rectangle is a stitch count, so if you crochet more loosely than 16 stitches over 4 in, a 60-stitch rectangle will come out wider than 15 in and the hood will sit loose and gape at the face. Crochet tighter and it will be too small. Row gauge matters less, because you can add or remove a row to fix the height.
- With the 4.0 mm hook, ch 22.
- Row 1: Hdc in 3rd ch from hook and in each ch across. (20 sts)
- Rows 2–15: Ch 2, turn. Hdc in each st across. (20 sts)
- Measure the center of the swatch. You need 16 stitches and 12 rows in 4 in (10 cm).
More stitches than that in 4 in means your fabric is too tight, so go up a hook size. Fewer means go down one. Swatch in the yarn you will use, because the hook size alone does not predict gauge.
Abbreviations and stitches
This pattern uses US crochet terms. In UK terms, half double crochet is half treble.
- ch = chain
- sl st = slip stitch
- hdc = half double crochet
- FPhdc = front post half double crochet
- BPhdc = back post half double crochet
- st(s) = stitch(es)
- RS / WS = right side / wrong side
- rnd = round
- rep = repeat
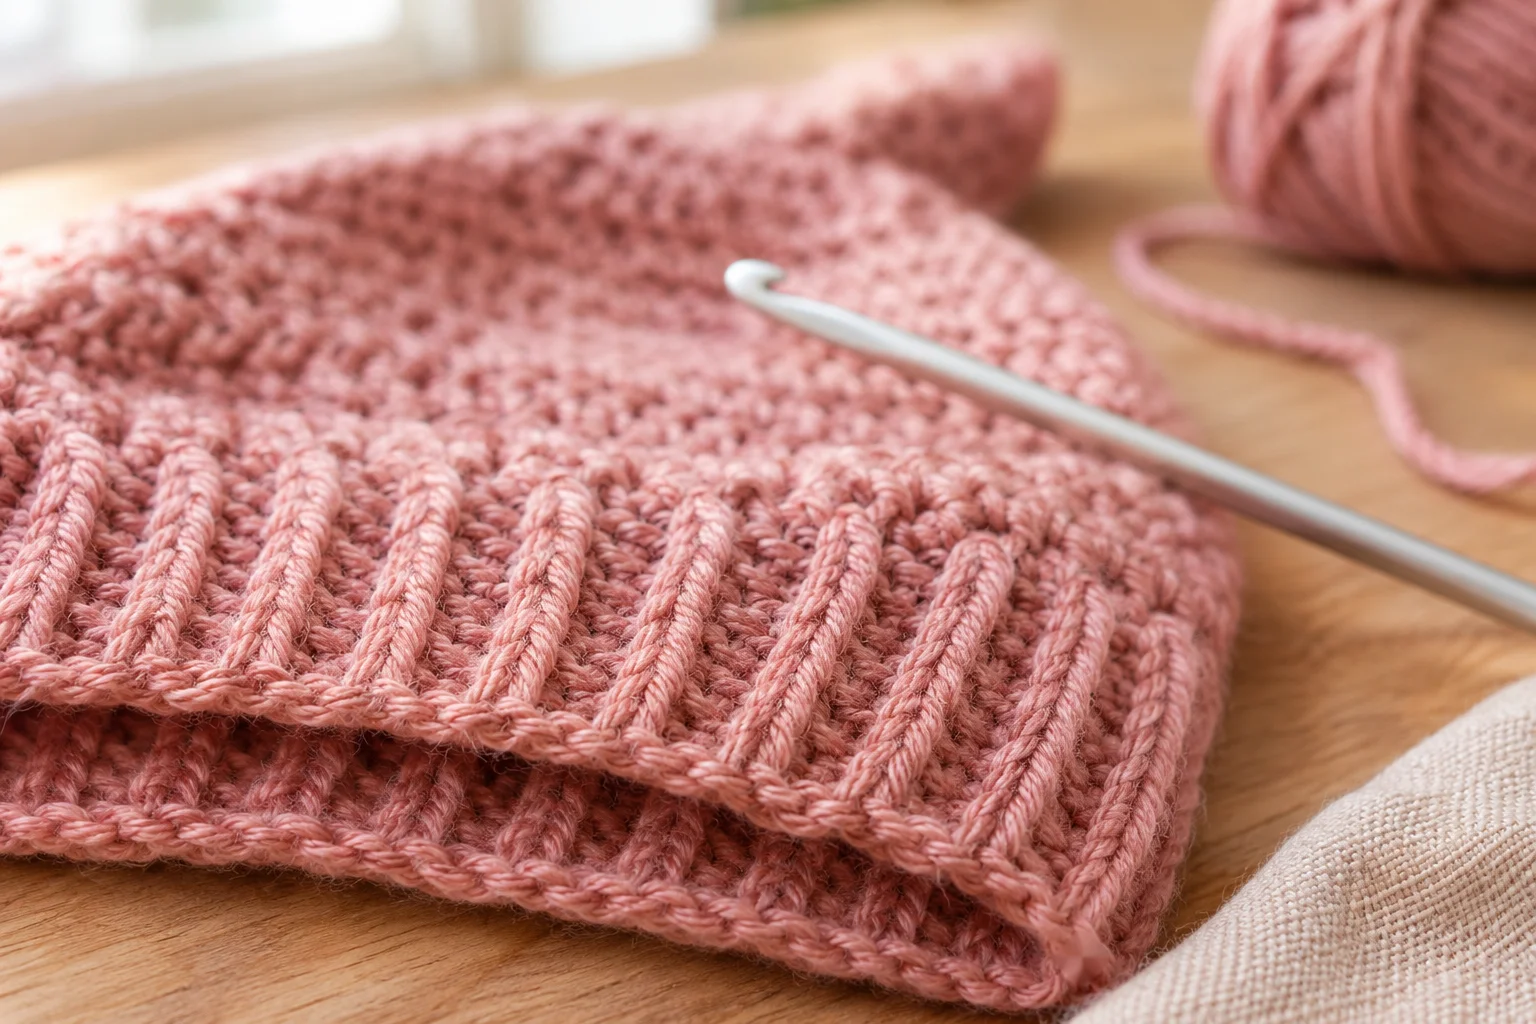
To work a front post half double crochet, yarn over, insert the hook from front to back to front around the post of the stitch (the upright stem), yarn over, pull up a loop, yarn over and pull through all 3 loops. A back post half double crochet is the same, except the hook goes from back to front to back around the post. Front post stitches push the ridge toward you and back post stitches push it away, which is what forms the rib.
A ch 2 at the start of a row does not count as a stitch. Work the first hdc into the first stitch of the row below, and skip the turning chain at the end of each row.
How the bonnet is built
You crochet one rectangle, with its rows running side to side. Folding it in half at the center of the rows brings the two short sides together. The top edge is seamed from the face edge to the fold, and the corner at the fold becomes the point. Everything left open is one continuous loop: along the neck, up one face edge, down the other and back along the neck. You edge that whole loop in the round, so there is no separate neckband to pick up.
Crochet baby bonnet pattern instructions
Step 1: Make the rectangle
- With the 4.0 mm hook, ch 62 (66, 70).
- Row 1: Hdc in 3rd ch from hook and in each ch across. The 2 skipped chains do not count as a stitch. (60 (64, 68) sts)
- Rows 2–24 (26, 28): Ch 2, turn. Hdc in first st and in each st across, skipping the turning chain at the end. (60 (64, 68) sts)
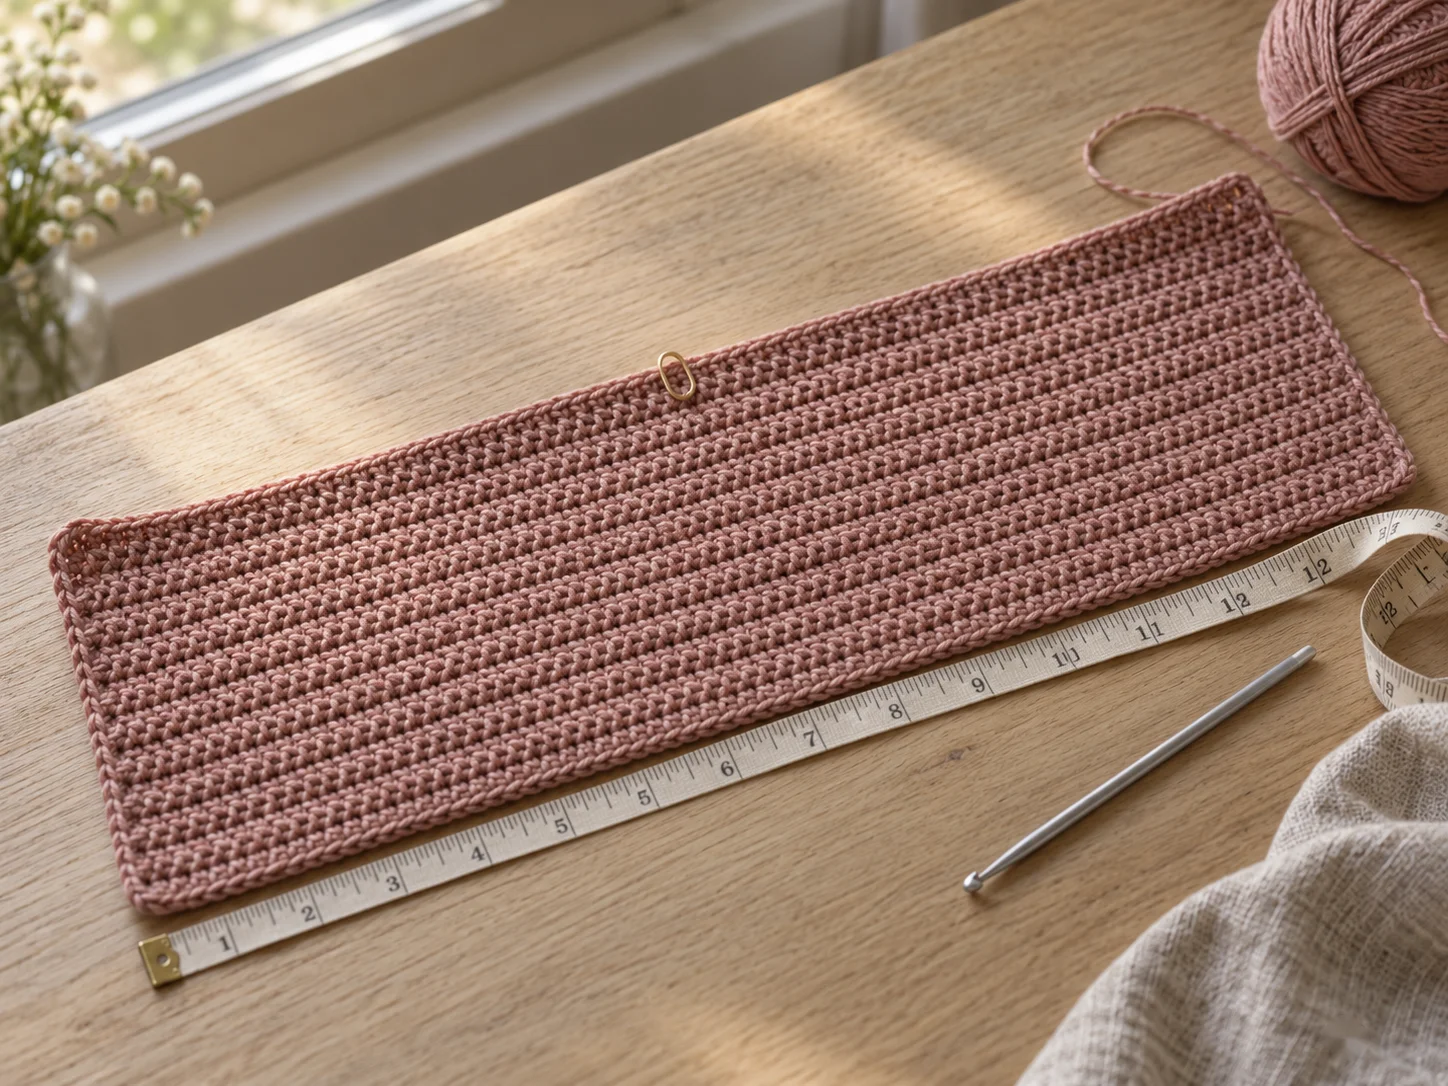
- Fasten off, leaving an 18 in (45 cm) tail for sewing.
Lay the piece flat. It should measure about 15 (16, 17) in wide and 8 (8.7, 9.3) in tall. Put a stitch marker in the last row between stitch 30 (32, 34) and the next stitch. That is where the fold will be. If one side edge looks wavy, count your stitches; you have most likely skipped the first stitch or added one at the end of a row.
Step 2: Fold and seam the top
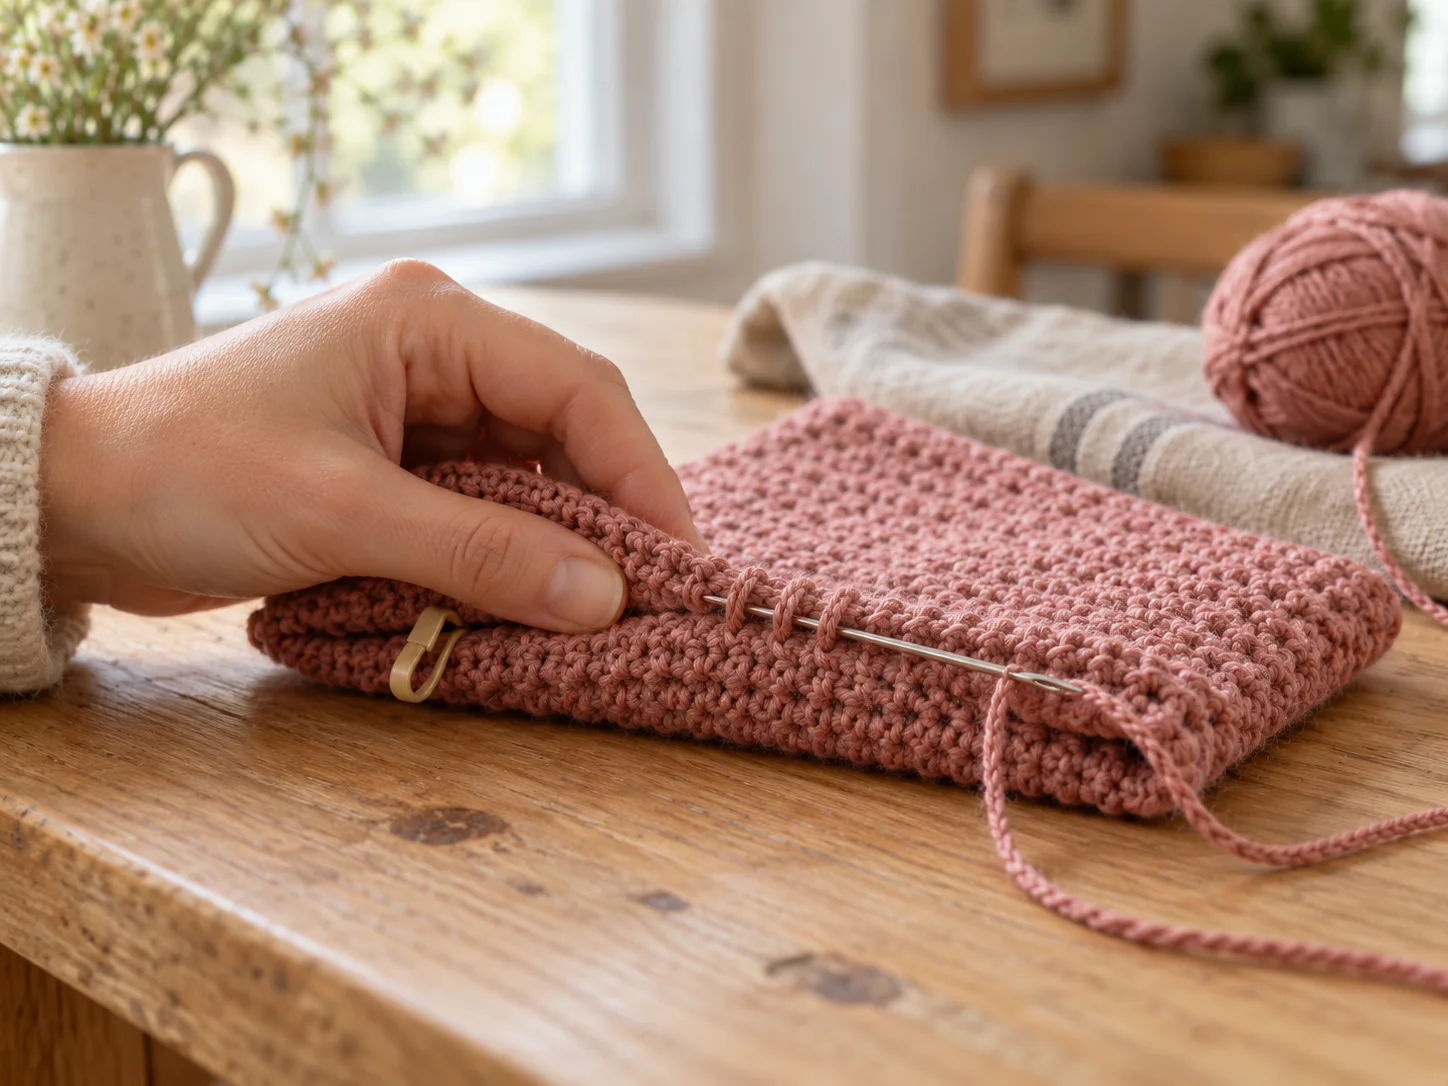
- Fold the rectangle in half so the two short sides meet, right sides together. The marker in the last row is now at the fold.
- Match the top edges stitch for stitch. Stitch 1 of the last row lines up with stitch 60 (64, 68), and so on down to the fold.
- Thread the tail onto a yarn needle. Starting at the face edge, whipstitch the top edges together through both loops of each pair of stitches, working 30 (32, 34) stitches toward the fold.
- Fasten off securely, weave in the end, then turn the bonnet right side out and push the corner at the fold out into a point.
The seam is 7.5 (8, 8.5) in long. Keep your sewing stitches the same tension as the crochet; a seam pulled tight will pucker the top and flatten the point.
Step 3: Work the first edging round
Switch to the 3.5 mm hook. You will work 108 (116, 124) stitches around the open edge: 30 (32, 34) along the neck, 24 (26, 28) up one face edge, 24 (26, 28) down the other, and 30 (32, 34) back along the neck.
- With the RS facing, join yarn with a sl st in the free loop of the foundation chain, right next to the bottom of the fold.
- Rnd 1: Ch 2. Hdc in the same loop, then in the free loop of each of the next 29 (31, 33) chains. Work 24 (26, 28) hdc up the face edge, 1 in the end of each row. Work 24 (26, 28) hdc down the other face edge, 1 in the end of each row. Hdc in the free loop of each of the remaining 30 (32, 34) chains. Join with a sl st to the first hdc. (108 (116, 124) sts)
Count the stitches at this point. The two face edges should hold exactly as many hdc as the rectangle has rows. If one side has fewer, you have probably skipped a row end, and fixing it now is much easier than undoing the ribbing.
Step 4: Work the ribbing
Do not turn in these rounds. You are working in a spiral of joined rounds with the right side always facing you.
- Rnd 2: Ch 2. FPhdc around the first st, BPhdc around the next st. *FPhdc around the next st, BPhdc around the next st; rep from * around. Join with a sl st to the first st. (108 (116, 124) sts)
- Rnds 3–5: Ch 2. FPhdc around each FPhdc and BPhdc around each BPhdc of the previous rnd. Join with a sl st to the first st. (108 (116, 124) sts)
- Fasten off and weave in the end.
The ribs should stack in straight vertical lines. If they zigzag, a post stitch has landed on the wrong stitch; check the round you just finished before you go on.
Finishing and care
Weave in every end through several stitches, change direction once so it cannot work loose, and tug each one gently afterward. Loose ends matter more on baby items. Check the top seam the same way.
Wash according to your yarn label, since it differs by fiber. Blocking is optional here. Acrylic can lose its shape permanently with direct heat, so skip steam unless the label says it is fine.
Why this bonnet has no ties
The ribbed edge holds the opening snug, so ties are not needed, and I would leave them off. Cords near a baby’s neck and face are best avoided. I would also skip buttons, pompoms and other small trims, because anything that can come loose becomes a hazard. No handmade item can be called completely safe. Supervise the baby while the bonnet is worn, and check your pediatrician’s current guidance on hats and sleep; I would not put a bonnet on a sleeping baby. For wider background on handmade baby items, there is a guide on what to consider with handmade baby items. It is written for blankets, not bonnets, but it is a useful general reference.
Adjusting the size
At this gauge the pattern scales with simple arithmetic. Each inch of width is 4 stitches, so a rectangle w inches wide needs 4w stitches and a foundation chain of 4w + 2. Keep the stitch count even so the fold falls between two stitches. Each inch of height is 3 rows. The edging round has (stitches per row + 2 × rows) stitches, and that total must be even for the rib to alternate.
For example, to make the smallest size 1 in wider and 3 rows taller: 64 stitches, 27 rows, a foundation chain of 66, and an edging of 64 + 54 = 118 stitches (32 along each neck half and 27 up each face edge).
Customizing the bonnet
A contrasting color for the edging is the simplest change, because the edging is its own joined round and needs only one yarn change. Stripes in the body work too, but every color change adds ends to weave in. A heavier or lighter yarn changes the gauge, so recalculate using the formula above.
Troubleshooting
- The rectangle is the wrong width: your gauge is off. Go up a hook size if you have too many stitches in 4 in, down if too few.
- Wavy side edges: you have probably skipped the first stitch or worked into the turning chain at the end. Count after Row 1 and again after Row 10.
- A gap at the top of the face edge: snug up the stitches next to the seam with the tail and weave it in.
- The ribbed edge flares: use the smaller hook, and check the ribs are stacking in straight lines.
- The point looks flat: the corner is a soft point, not a cone. A firmer yarn and tighter gauge hold it better.
- Yarn splitting: a smooth, tightly plied yarn and a hook with a rounded tip help.
Making a gift set
This bonnet is a gift for the months after the newborn stage, since the smallest size fits about 6–12 months. If you are putting a baby gift together, the newborn blanket pattern and yarn guide covers a blanket, and free newborn blanket pattern ideas has more options.
FAQ
What yarn is best for a crochet baby bonnet?
A smooth light (#3) yarn that is soft and washable. Acrylic blends are the easiest to care for.
Is the bonnet worked flat or in the round?
The body is worked flat in rows. The ribbed edging is worked in the round.
How do I make it bigger or smaller?
Use the formula in the sizing section: 4 stitches and 3 rows per inch at gauge.
Can a beginner crochet this?
An advanced beginner can. The parts to take slowly are the post stitches and counting row ends for the edging.
How do I wash it?
Follow your yarn’s label. The right care depends on the fiber.
Is it safe for a baby to wear a bonnet?
Nothing handmade is completely safe. This design has no ties or trims, but supervise the baby, and ask your pediatrician about hats and sleep.

Last updated . Found something out of date? Let us know.