 Accessories
 Baby & Kids
 Blankets & Afghans
 Clothing
Mini Crochet Taco Keychain Amigurumi
A mini crochet taco keychain in worsted weight cotton: two folded yellow shells hold a brown meat disc, three red tomatoes and a ruffled green lettuce strip.
 Nicole Sinclair
Published · 14 min read
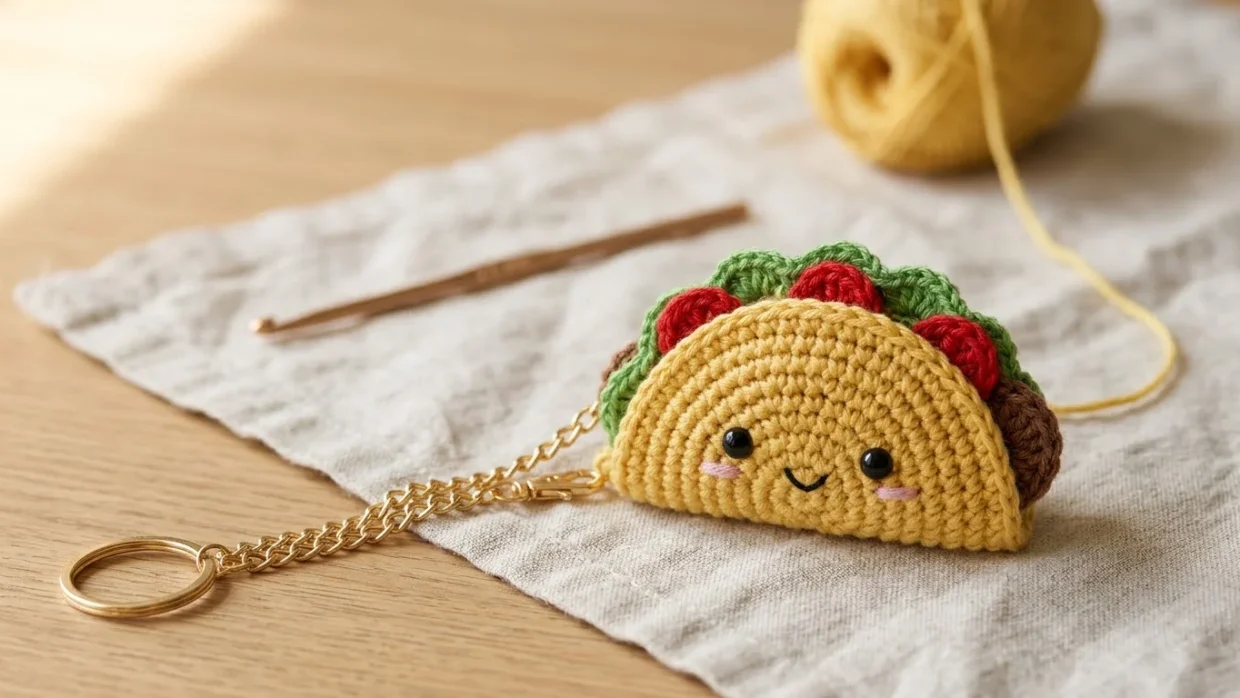
The finished mini crochet taco with a yellow shell, brown meat, red tomatoes and green lettuce, hanging from a gold-tone keychain
Pattern at a Glance
- Skill level
- Easy
- Yarn weight
- Worsted weight cotton
- Hook size
- 2.5 mm
- Yarn needed
- Small amounts of yellow, brown, green and red
- Construction
- Worked in the round, then sewn and joined
- Stitches
- sc, inc, sl st, hdc, dc
- Pattern type
- Amigurumi
- Project type
- Keychain
This mini crochet taco keychain is a small amigurumi made from separate pieces: two yellow shells, a brown meat disc, three red tomatoes and a ruffled green lettuce strip. The pieces are sewn together and joined with single crochet, then finished with a keychain ring and chain.
The stitches are basic, but the pieces are tiny, so firm tension and neat sewing matter more than speed.
Materials & Supplies
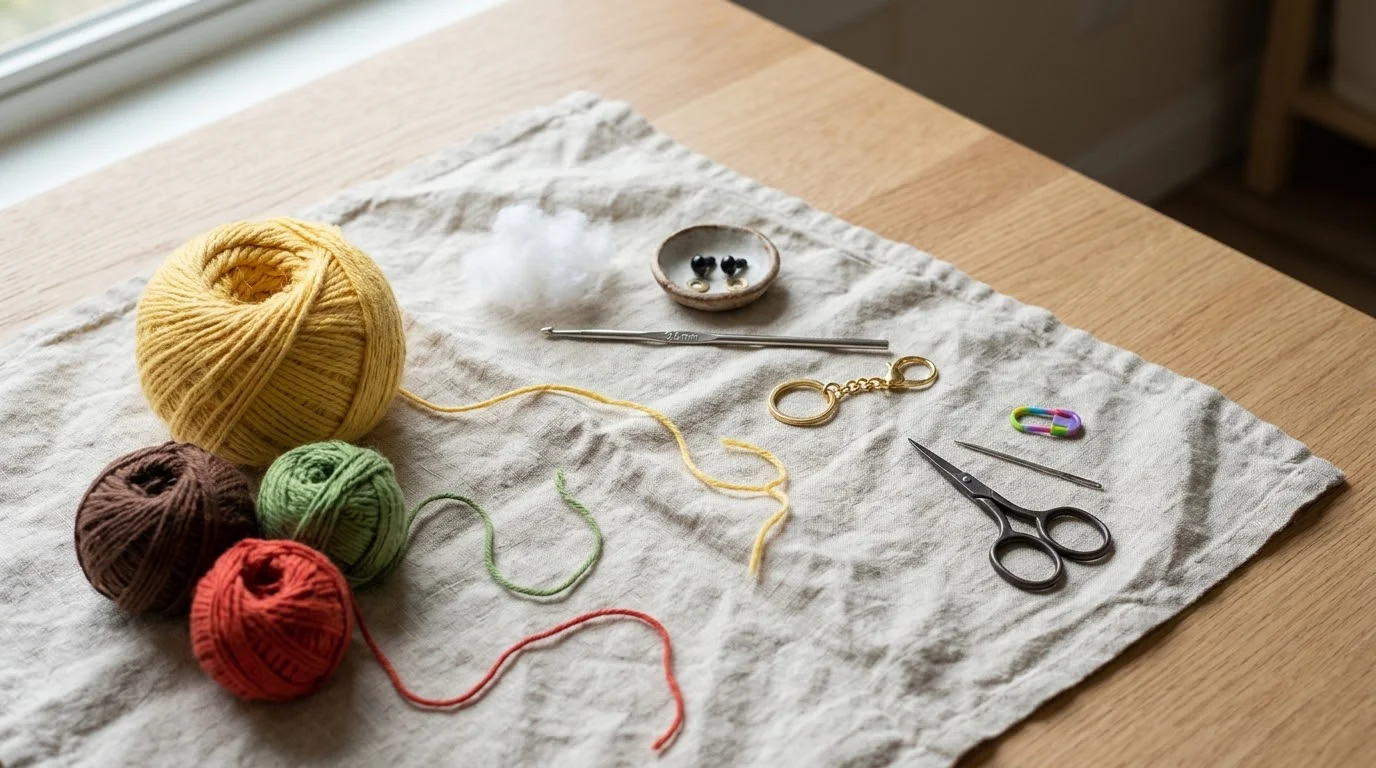
Required
- Worsted weight cotton yarn in four colors: yellow for the shells, brown for the meat, green for the lettuce and red for the tomatoes. Each color is used in small amounts.
- 2.5 mm crochet hook
- Safety eyes, 4-6 mm (one pair)
- Keychain with ring and chain
- Yarn needle
- Scissors
Optional
- Stitch marker. I would use one on every round, because it saves you from recounting a tiny round to find where it starts. A loop of scrap yarn works too.
- Fiberfill, a tiny amount, if you want a stiffer shape
Worsted weight yarn is normally worked on a much larger hook than 2.5 mm, so this pairing gives a very dense fabric. That density keeps fiberfill and the backs of the safety eyes from showing, and cotton has little stretch, so the folded shells hold their half-moon shape. The tradeoff is that cotton shows uneven tension more than a springy acrylic does, so keep your stitches even.
You can use another worsted weight yarn, but expect a different result: a stretchier fiber usually gives a softer, slightly larger piece and makes it easier for gaps to open between stitches. Keep the hook small for the yarn weight. If you move to a thicker yarn on a larger hook, expect a bigger taco and use larger eyes to match.
Gauge & Sizing
There is no gauge to match here, because every piece is a small circle or strip and none of it has to fit anything. Gauge only changes the size of the finished taco. Tension is the thing to watch: aim for stitches tight enough that no gaps show.
To check it, hold the shell up to the light after round 4 (24 stitches). If you can see light through the stitches, or holes open at the increases, switch to a smaller hook. As small crochet projects go, this one forgives very little loose tension, because the stitches are close together and any gap shows.
There is one size. It is set by your yarn and hook, so measure across your first shell after round 7 and make the second shell the same diameter. Both shells must match or their edges will not line up when you join them.
If you change yarn or hook, the taco scales with the stitch size: thicker yarn on a larger hook gives a larger taco, finer yarn on a smaller hook a smaller one. The stitch counts do not change. Choose safety eyes within the 4-6 mm range to suit the size you end up with.
Before You Begin
This pattern uses US crochet terms.
| Abbreviation | Meaning |
|---|---|
| ch | chain |
| st(s) | stitch(es) |
| sc | single crochet |
| inc | increase: 2 sc in the same stitch |
| sl st | slip stitch |
| hdc | half double crochet |
| dc | double crochet |
| ( ) | a group of stitches to repeat, or stitches all worked into the same stitch where the instruction says so |
| (18 sts) | the total stitch count at the end of a round or row |
If you normally use UK terms: US sc is UK dc, US hdc is UK htr and US dc is UK tr.
- Magic ring: wrap the yarn into a loop, work the first round of stitches into the loop, then pull the yarn tail to close the center.
- Increase (inc): work 2 sc into the same stitch, which adds one stitch to the round.
- Working through both layers: after folding a piece, insert the hook through the matching stitch of the front and back layer together, then complete the sc as usual.
The shells, meat and tomatoes are worked in continuous rounds from a magic ring: do not join and do not turn, and move a stitch marker up into the first stitch of each round. The lettuce is a single strip worked along a chain. The shells are flat circles that you fold into half-moons, with the straight bottom edge as the fold and the curved edge as the top where the fillings show. If the magic ring or working in continuous rounds is new to you, how amigurumi is worked step by step covers it before you start.
Free Crochet Pattern Instructions
Part 1 – Taco shells (make 2)
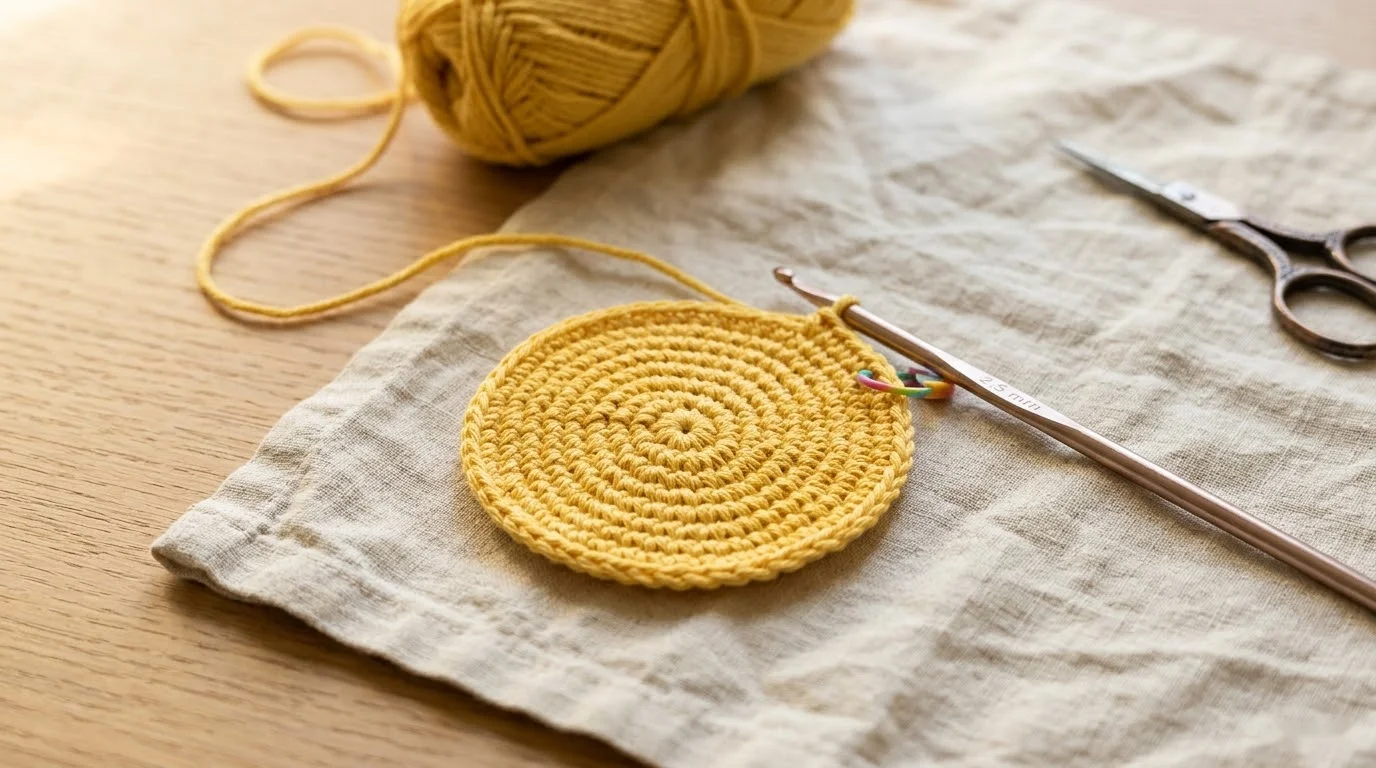
Each shell is seven rounds of a flat 36-stitch circle that you then fold in half and close. Work both the same way; the first becomes the front, so it gets the safety eyes.
Step 1 – Rounds 1-3
Pattern instruction:
- Round 1: Make a magic ring, 6 sc in the ring. (6 sts)
- Round 2: Inc in each st around. (12 sts)
- Round 3: (Sc, inc) 6 times around. (18 sts)
Beginner explanation: After round 1, pull the yarn tail to close the center of the magic ring so no hole is left. Round 2 means two sc in every stitch. In round 3 you work one sc, then two sc in the next stitch, and repeat that pair all the way around. Put your stitch marker in the first stitch of each round and move it up as you go.
Checkpoint: 18 sts, with six evenly spaced increases. The piece should lie flat like a small coin; if it cups or ruffles, recount and check Troubleshooting.
Step 2 – Rounds 4-6
Pattern instruction:
- Round 4: (2 sc, inc) 6 times around. (24 sts)
- Round 5: (3 sc, inc) 6 times around. (30 sts)
- Round 6: (4 sc, inc) 6 times around. (36 sts)
Beginner explanation: Each round puts one more plain sc between the increases than the round before. That keeps the six increase points evenly spaced, so the circle stays flat as it grows instead of turning into a bowl or a ruffle.
Checkpoint: 24 sts after round 4, 30 sts after round 5 and 36 sts after round 6. Count after every round; one missed increase here is hard to hide later.
Step 3 – Round 7
Pattern instruction: Round 7: Sc in each st around. (36 sts) Do not fasten off yet.
Beginner explanation: There are no increases in this round. It gives the circle a straight, even edge, and these are the stitches you will fold and close in the next step. Leave the loop on your hook when you reach the end of the round.
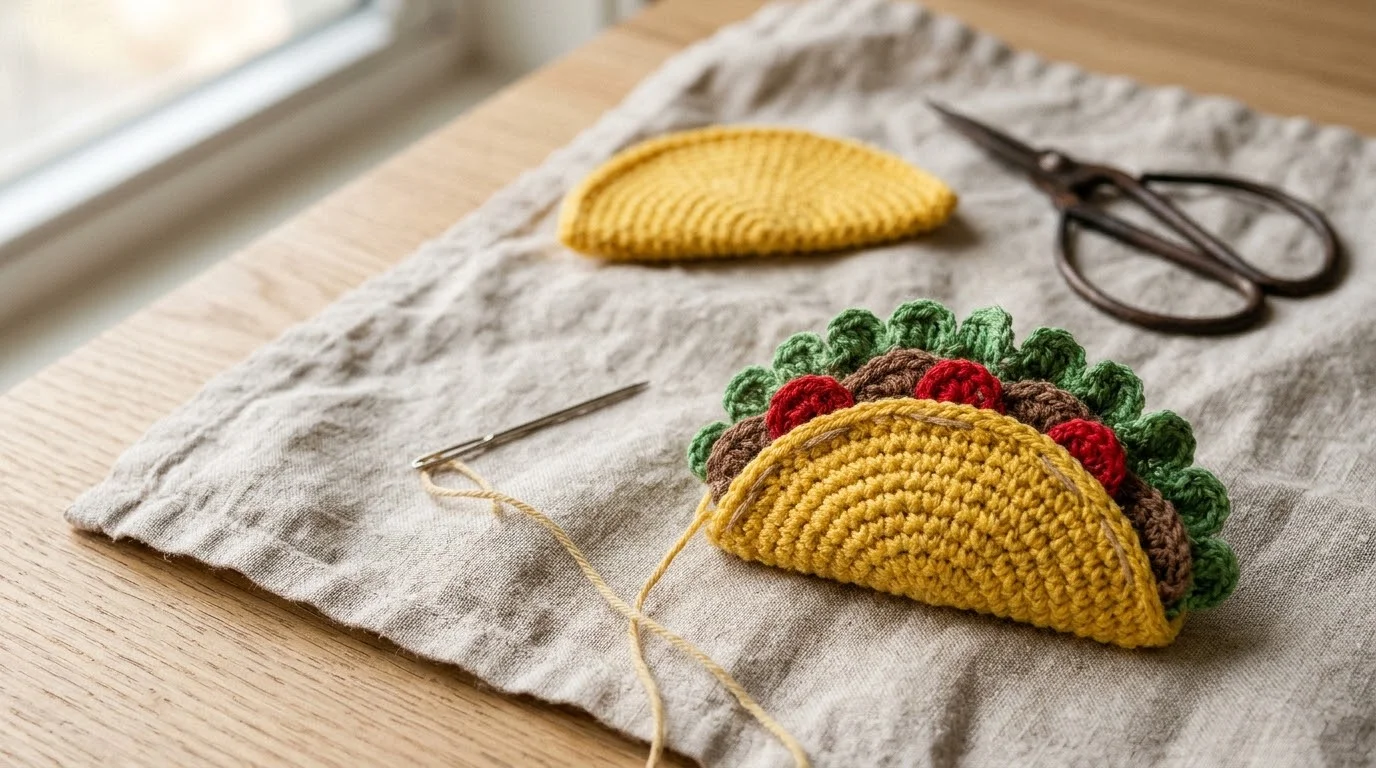
Checkpoint: 36 sts, and the disc lies flat. Measure across it now; the second shell must end up the same diameter.
Step 4 – Fold and close the front shell
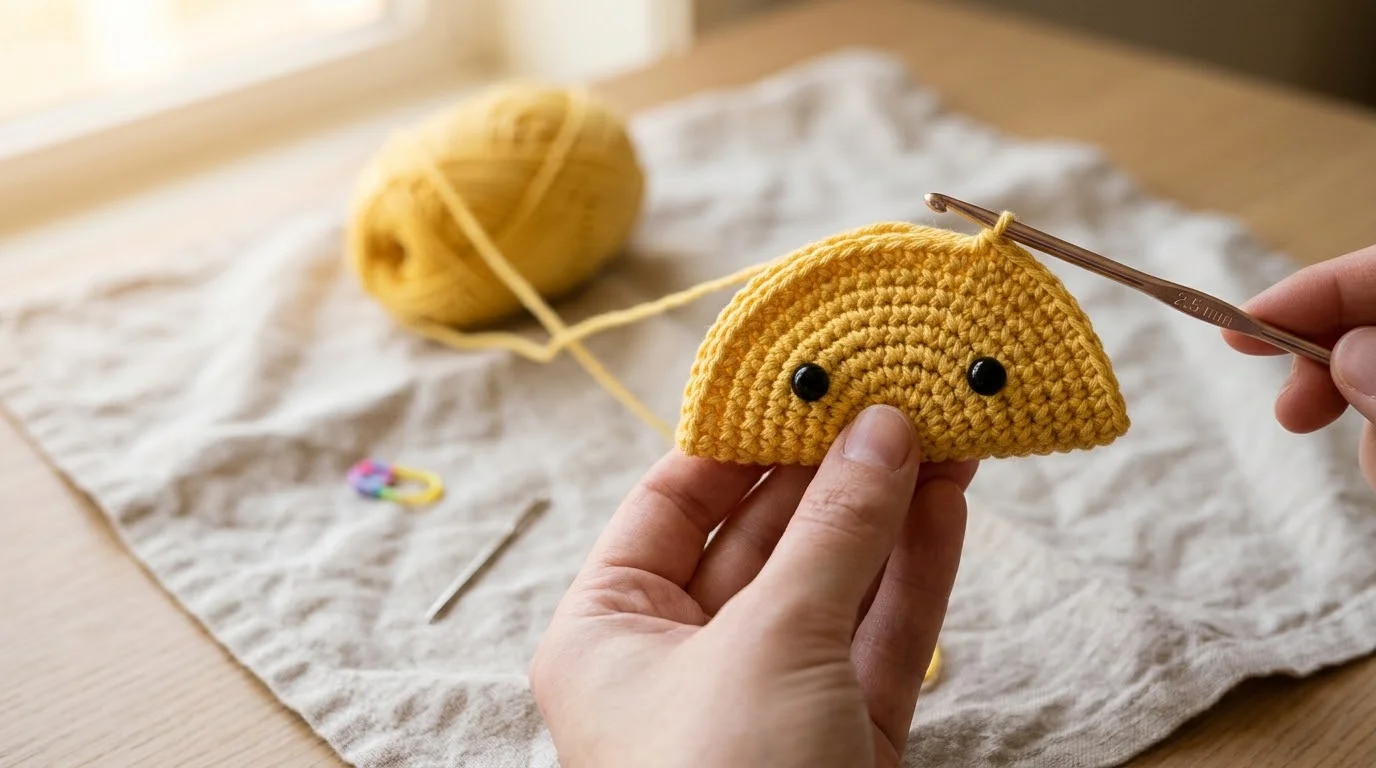
Pattern instruction: Fold the shell in half so the ends meet. Sc through both layers across to close. (18 sc) Fasten off, leave a tail for sewing.
Beginner explanation: Fold the circle along a straight line through the center, so each edge stitch on one half sits directly on top of its matching stitch on the other half. Keep the hook in the loop from round 7 at one end of the fold. For the front shell only, attach the safety eyes before you close it: push the posts through the front layer, centered on the shell face with a small gap between the eyes, and fasten the washers inside the fold. Then work one sc through the matching stitch of both layers at once, and repeat across the whole curved edge. If you want a stiffer shell, tuck in a tiny amount of fiberfill before the last few sc.
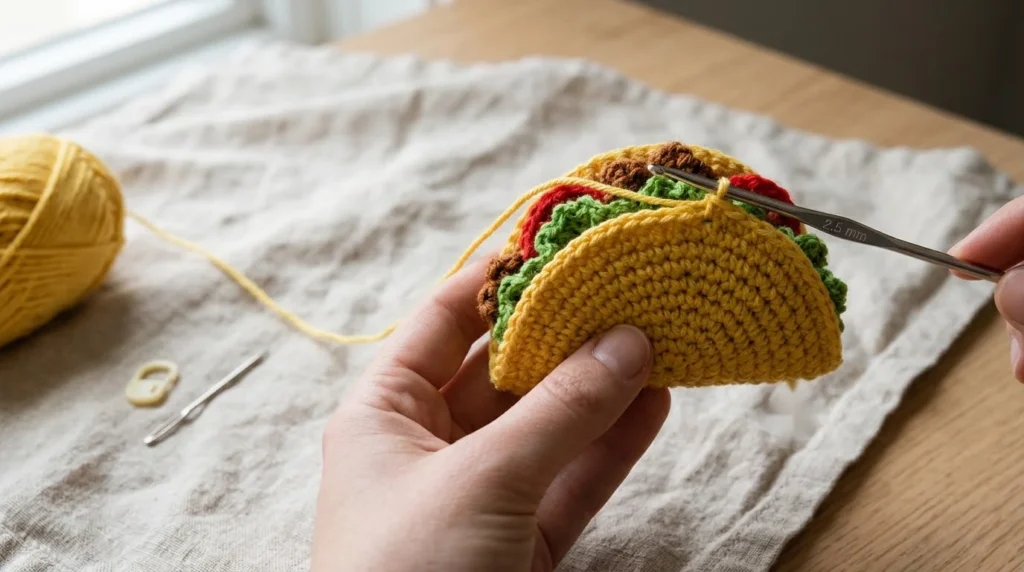
Checkpoint: 18 sc across the closed edge (36 stitches folded in half give 18 pairs), a half-moon with the fold along the straight bottom, and both eyes firmly in place. If the two halves do not line up stitch for stitch, open the fold and refold before continuing.
Step 5 – Second shell
Pattern instruction: Rep Steps 1-4 for the second shell, leaving out the safety eyes. (18 sc across the closed edge)
Beginner explanation: Work the same seven rounds, then fold and close the same way. The second shell is the back of the taco, so it has a plain face.
Checkpoint: Two half-moon shells of the same size. Stack them with the curved edges together; if one is noticeably larger, check its round 7 count first, then your tension.
Part 2 – Meat (brown)
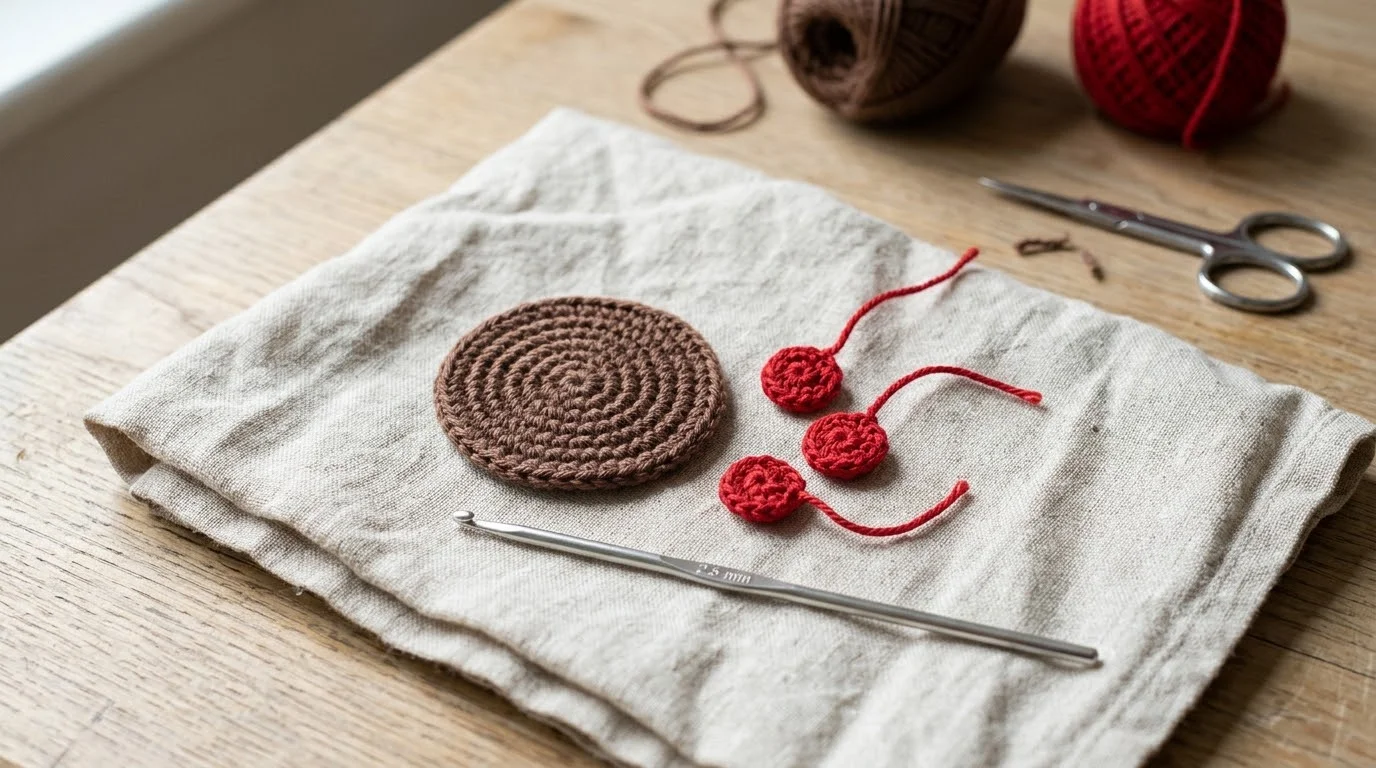
The meat is a small flat disc of three rounds.
Step 1 – Rounds 1-3
Pattern instruction:
- Round 1: Make a magic ring, 6 sc in the ring. (6 sts)
- Round 2: Inc in each st around. (12 sts)
- Round 3: Sc in each st around. (12 sts)
Fasten off, leave a tail for sewing.
Beginner explanation: Rounds 1 and 2 are the same start as the shell. Round 3 has no increases, so it gives the disc a straight edge instead of growing it further. Cut the yarn, leaving a tail long enough to sew with, and pull it through the last loop.
Checkpoint: 12 sts, a flat disc that is clearly smaller than a shell.
Part 3 – Tomatoes (red, make 3)
Step 1 – Tomato
Pattern instruction: Round 1: Make a magic ring, 4 sc in the ring. (4 sts) Fasten off, leave a tail for sewing. Make 3.
Beginner explanation: Four stitches make a very small ring, so pull the yarn tail firmly to close the center completely. Pull the working yarn through the last loop and tighten it, then leave the tail long enough to sew the tomato on later.
Checkpoint: Three tiny red pieces with 4 sts each and no hole in the center, plus the brown meat disc from Part 2.
Part 4 – Lettuce (green)
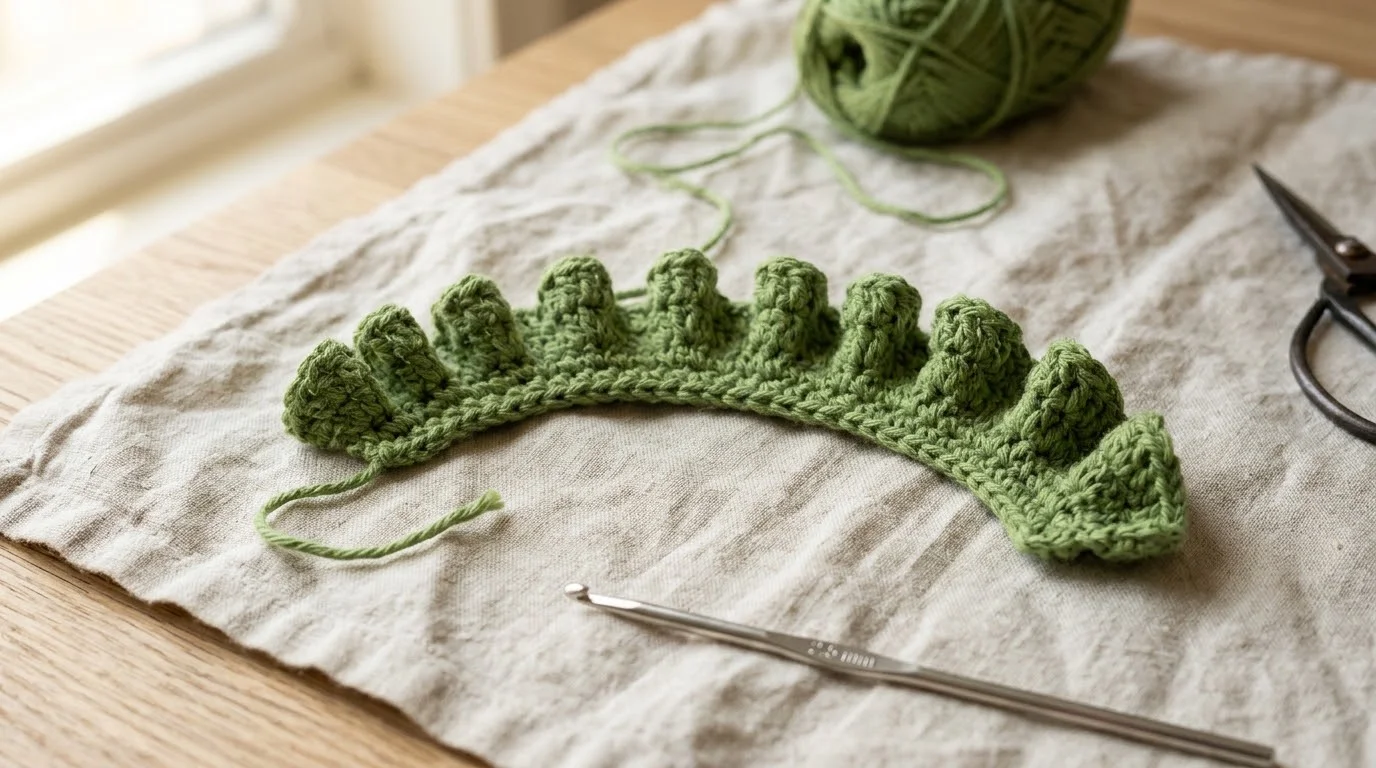
The lettuce is one worked strip: a chain with a ruffle worked into every third chain.
Step 1 – Foundation chain
Pattern instruction: Ch 25. (25 chs)
Beginner explanation: Make the chain a little looser than your sc tension. A tight chain pulls the ruffles into a bunch. Do not count the loop on your hook.
Checkpoint: 25 chs. You will skip the first ch from the hook, which leaves 24 chs to work into.
Step 2 – First ruffle
Pattern instruction: Starting in the 2nd ch from hook, (sl st, hdc, dc, hdc, sl st) all in the same ch. Sl st in each of the next 2 chs. (1 ruffle, 3 chs used)
Beginner explanation: Put all five stitches into the same chain, one after another. They crowd together and curl up into a small leaf shape. Then slip stitch into each of the next two chains, which flattens the strip between ruffles.
Checkpoint: One curled ruffle followed by two slip stitches, with 21 chs still unworked.
Step 3 – Repeat across
Pattern instruction: Rep Step 2 across: (sl st, hdc, dc, hdc, sl st) all in the next ch, sl st in each of the next 2 chs. Work 7 more times (8 ruffles in total). Fasten off, leave a tail for sewing.
Beginner explanation: Each ruffle and its two slip stitches use three chains, so the last repeat lands exactly on the last chain. Keep the ruffles on the same side of the strip.
Checkpoint: 8 ruffles and all 24 chs used. If you are short of chains or have some left over, recount your foundation chain and the stitches in your last ruffles.
Finishing
You now have two shells (the front with its eyes), one meat disc, three tomatoes and one lettuce strip. Assembly is sewing, then one round of single crochet.
Sew on the fillings
Lay the front shell with its eyes against the table, so the back of the shell faces up. Sew the fillings on in this order, using each piece’s tail:
- Sew the meat to the back of the front shell, close to the curved edge. If you want more dimension, tuck a tiny pinch of fiberfill under the meat before you sew the last few stitches.
- Sew the three tomatoes on top of the meat, spaced evenly along the curve.
- Sew the lettuce strip across the top along the curved edge, with the ruffles pointing outward past the edge.
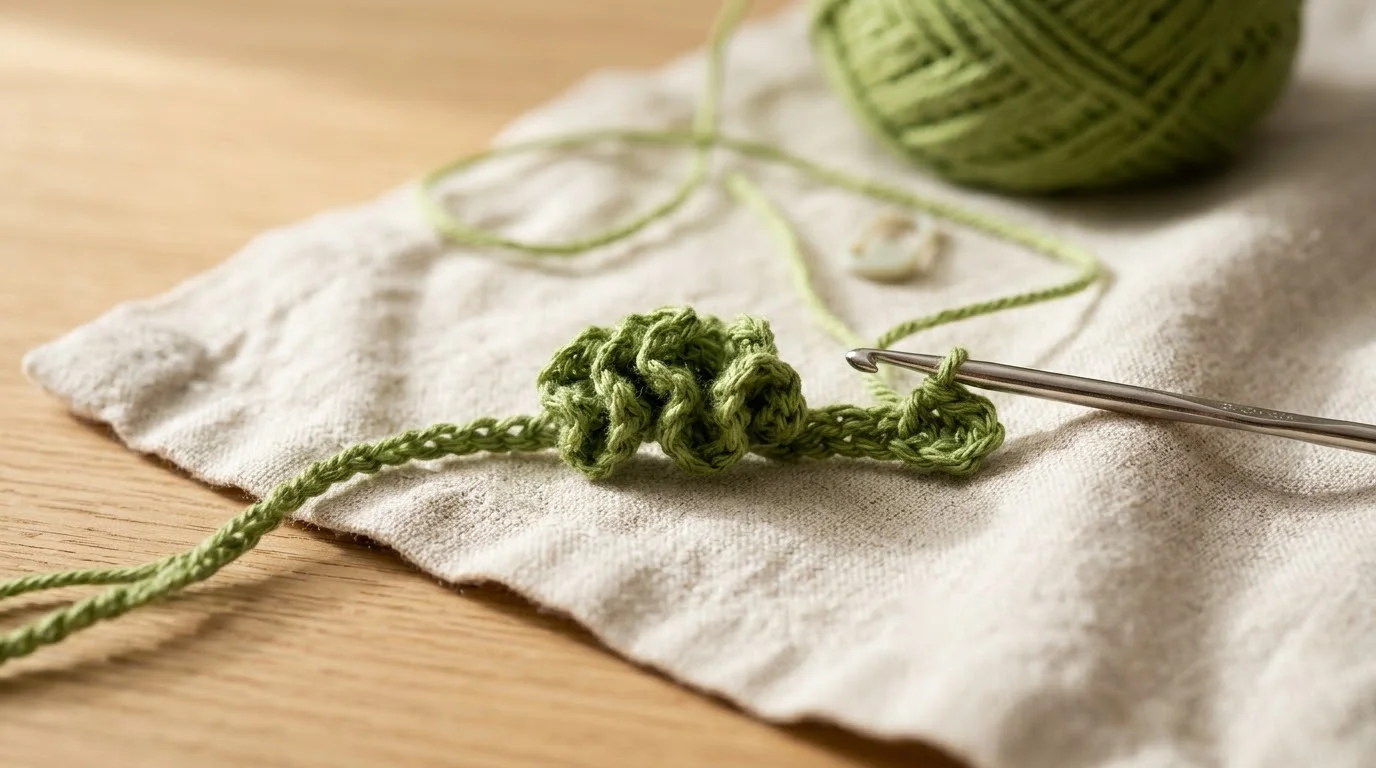
Checkpoint: The meat, 3 tomatoes and the 8-ruffle lettuce strip are all secure. Tug each piece gently; anything that moves needs another stitch before the shells go on.
Join the shells
Place the second shell on the back of the fillings, with its curved edge matched to the front shell’s, so the fillings sit between the two shells. Join yellow yarn at one end and sc around the edge through both layers. Insert the hook through the closing stitches of both shells together along the curved edge, then through both folds along the straight bottom, and space the stitches evenly so the edge lies flat. Fasten off and weave in all ends.
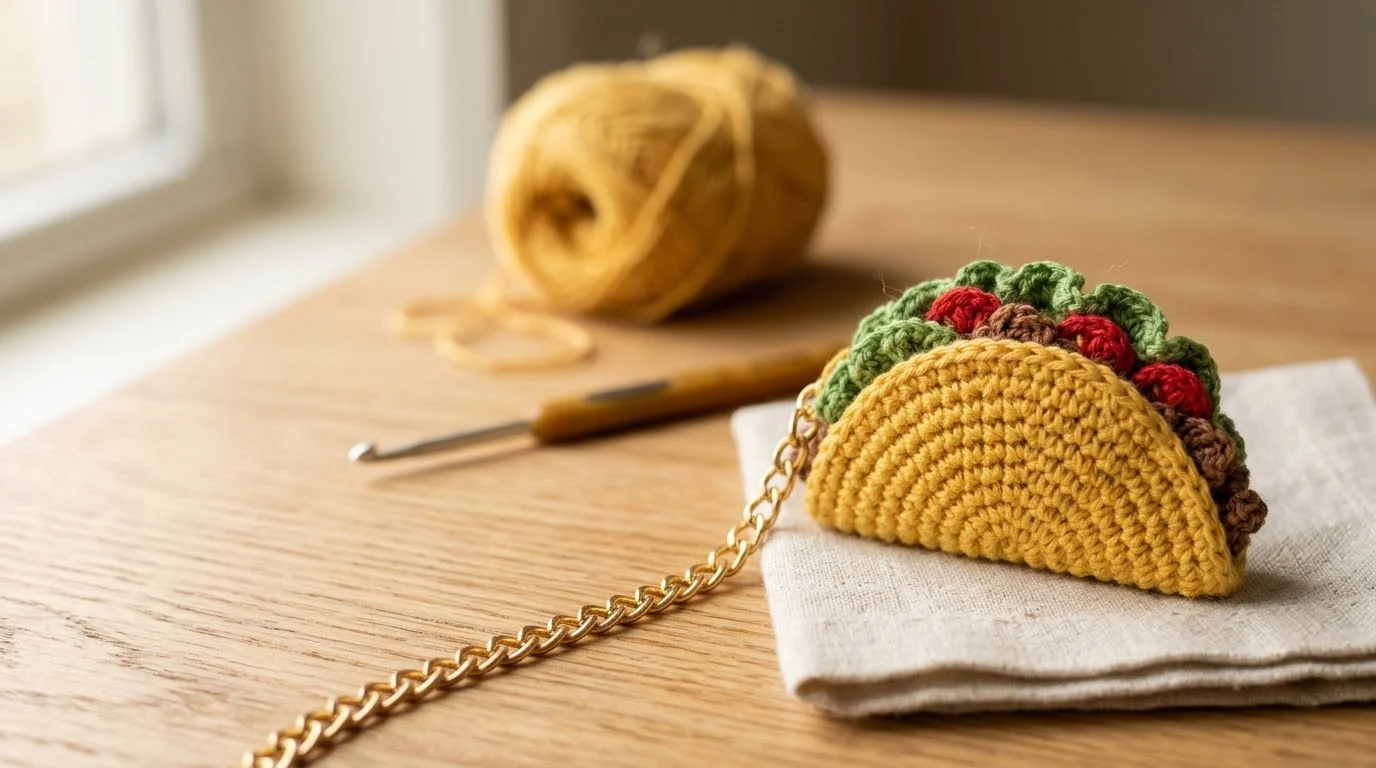
Checkpoint: The two shells sit edge to edge with no gap, and the fillings show only along the curved edge.
Attach the keychain
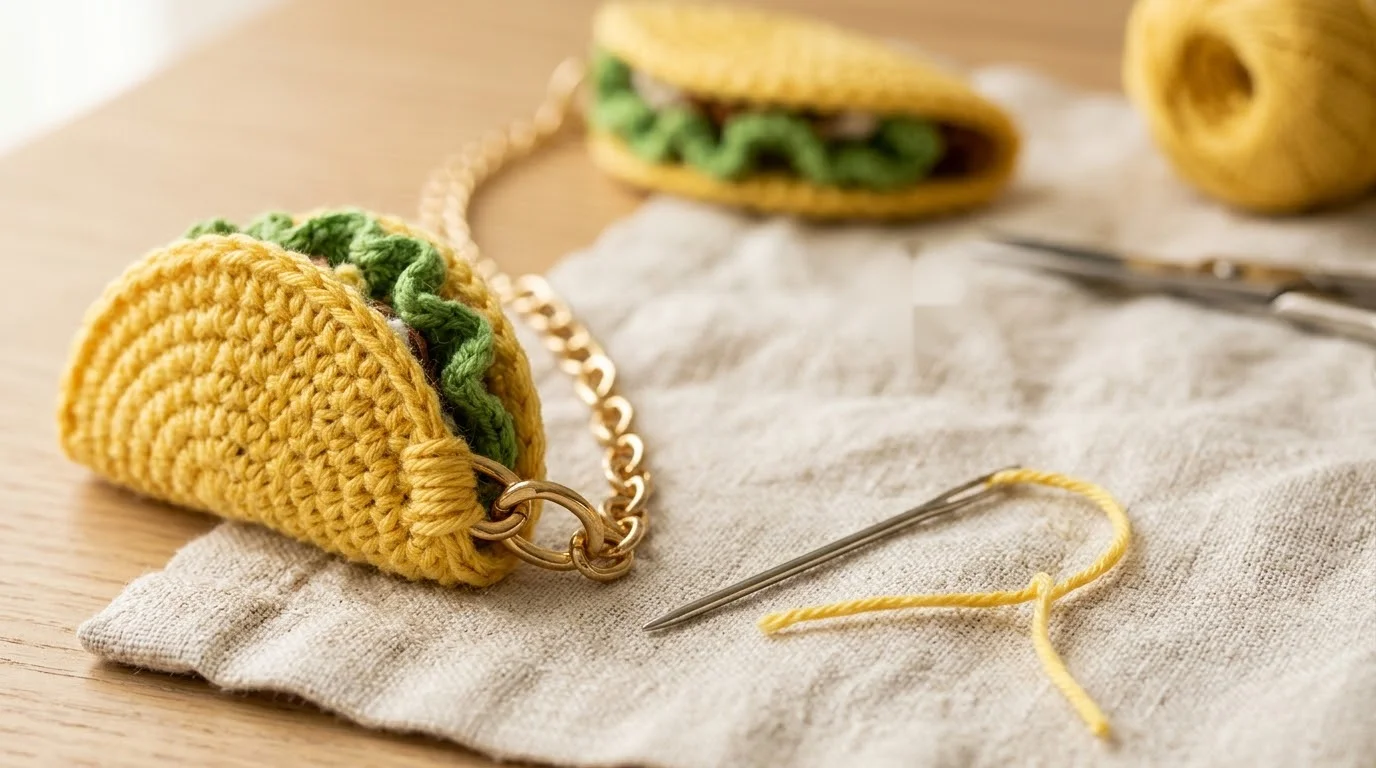
Attach the keychain at one end of the taco, where the curved edge meets the bottom. If the end link of the chain is an open ring, open it, hook it through the edge stitches of both shells at that corner, and close it again. If the link is closed, use yellow yarn and the yarn needle to sew around it several times, passing the needle through several edge stitches each time, so the load is spread over more than one stitch. Give the chain a gentle tug before you rely on it.
Optional face details
The pictured taco has a small embroidered smile and two cheek marks below the eyes. Both are optional, take only a few small stitches of leftover yarn, and are best added with the shells joined so you can see the finished face.
Troubleshooting & Common Mistakes
- The shell cups like a bowl or ripples at the edge. The stitch count is off. A bowl means an increase was missed; ripples mean an extra one. Recount against 6, 12, 18, 24, 30 and 36 and rework from the round that is wrong.
- Gaps show between stitches. Your tension is too loose for this yarn and hook. Hold the piece to the light, then switch to a smaller hook or pull each stitch snugger.
- The two halves of the shell do not line up when folded. Check that round 7 has 36 sts, then refold so the stitch on your hook sits at one end of the fold and every stitch faces its match.
- The second shell is a different size from the first. Tension drifted between the two. Compare the diameter after round 7 and adjust your hook or tension on the second shell.
- A tomato opens up or unravels. The ring is too small to tolerate a loose center. Pull the tail very firmly, tighten the last loop, and sew the tomato down with its tail through several stitches.
- The lettuce bunches instead of ruffling. The foundation chain is too tight. Remake it a little looser so each ruffle has room to curl.
- The keychain works loose. It was attached through too few stitches. Re-sew it through several edge stitches of both shells.
Variations, Sizes & Care
Size. The stitch counts stay the same when you change the yarn or hook; only the size changes. Thicker yarn on a larger hook gives a bigger taco, so choose larger eyes within the 4-6 mm range to match. Work a full test shell before you commit to a substitution.
Colors. Each component is its own color, so you can recolor any piece without changing a stitch. Keep the lettuce, tomatoes and meat in colors that contrast with each other and with the shell so they stay readable at this size.
Other uses. The finished taco also works as a bag charm, a zipper pull or a small ornament. If you want a bag to hang it from, try a free crochet bag pattern to clip it onto or this granny square bag pattern.
Care. Check the ball band of your cotton yarn for its care instructions. Because this piece has metal hardware, safety eyes and optional fiberfill, I would spot clean it by hand with a damp cloth rather than machine wash it. A small stuffed piece with hardware is not suitable for babies or young children.
Frequently Asked Questions
Why does the pattern use two shells?
The front shell carries the safety eyes and the face. The second shell goes behind the fillings, so the meat, tomatoes and lettuce sit between two shells and show only along the curved edge. Without it the back of the fillings would be loose.
Do I have to use fiberfill?
No. On a 2.5 mm hook with worsted weight cotton, the fabric is dense enough that the pieces should hold their shape without it. Fiberfill only makes the shell stiffer or gives the meat more dimension. If you add it, keep it to a tiny amount, because too much stretches the stitches and shows through.
Can I embroider the eyes instead of using safety eyes?
Yes. Skip the safety eyes in Step 4 and embroider two small, tight stitches with a scrap of dark yarn on the front shell instead. Nothing else in the pattern changes.

Last updated . Found something out of date? Let us know.