 Accessories
 Baby & Kids
 Blankets & Afghans
 Clothing
How to Make Amigurumi: the Full Process, Explained for Beginners
To make amigurumi, you crochet small shapes in tight rounds, stuff them before the opening closes, and sew the parts together. The stitches are simple, but first attempts tend to go wrong in the same places: a lost round start, a count that drifts, stuffing showing through gaps, parts attached crooked.
 Nicole Sinclair
Published · Updated · 11 min read
A plain mint-green rounded amigurumi piece beside a crochet hook, stitch marker, yarn needle and a small tuft of fiberfill
Amigurumi is a small stuffed piece crocheted in rounds. Because the stitches are tight and the piece is small, every uneven stitch is easy to see, and a wrong count changes the shape instead of just the size. That is why, when you learn how to make amigurumi, the order of the process matters more than any single stitch.
How to make amigurumi: the process in order
Every amigurumi piece, from a plain ball to a character with a hat, follows the same sequence.
- Start with a magic ring or a short chain.
- Work rounds of increases until the piece is as wide as you want it.
- Work rounds with no increases to build the sides.
- Work rounds of decreases to narrow the shape, and start stuffing before the opening becomes too small to reach into.
- Place any safety eyes before the last rounds, because they are fastened from the inside.
- Close the last round and hide the yarn tail.
- Pin, sew on any separate parts, and finish the details.
What to know before you start
You need five skills: making a chain (ch), a slip stitch (sl st), single crochet (sc), increasing (inc, meaning two sc in the same stitch), and decreasing (sc2tog, meaning single crochet two together). You also need to read the number in parentheses at the end of a round. If a round ends with (18), you should have 18 stitches (sts), and that is your main check. This article uses US terms throughout. A US single crochet is a UK double crochet, which matters if you follow a UK pattern.
If the chain and single crochet still feel new, learn the basic stitches with a simple blanket first, then come back. Tight, small stitches punish uneven tension more than a blanket does.
Materials, and what each one is for
Choose a smooth, plied yarn in a light or mid-tone color for a first piece. You can see the stitches clearly. Dark or fuzzy yarn hides the stitches, which makes counting and finding the last stitch of a round much harder. Fiber is a tradeoff. Cotton gives sharper stitch definition and less stretch, so it holds a shape firmly, but it is less forgiving when your tension varies. Acrylic stretches more, so uneven tension shows less. Check the label for fiber content and care.
Amigurumi is usually worked with a hook smaller than the yarn label suggests. That makes the fabric dense enough that stuffing cannot push through the gaps. The price is stitches that are harder to enter. Check the hook size on your yarn label, then go down one or two hook sizes and test a few rounds until the fabric looks closed but you can still get the hook in.
- Polyester fiberfill. The usual stuffing. It can be added in small pieces, which keeps the shape even.
- Stitch markers. At least one, to mark the end of each round. Without it you will count from the wrong place.
- Yarn needle. For closing the last round, sewing on parts and hiding ends.
- Pins. To hold parts in position before sewing. Moving a pin is easy, and undoing sewing is not.
- Scissors, and eyes. Safety eyes or embroidery yarn, covered in the features section.
Working in rounds: spiral or joined
Amigurumi is worked in rounds, not rows. You keep going around instead of turning your work, so the piece grows as a circle, then a tube. There are two ways to do this. In a continuous spiral you never join the round: you keep stitching and mark where each round ends. In joined rounds you finish each round with a sl st into the first stitch and chain before the next.
Start with the spiral. There is no seam to hide and no chain to count. The catch is that the round start is invisible, so the marker does real work. Mark the last stitch of every round. When you reach the marked stitch in the next round, work into it, then move the marker into the stitch you just made.
Starting the piece: magic ring or chain start
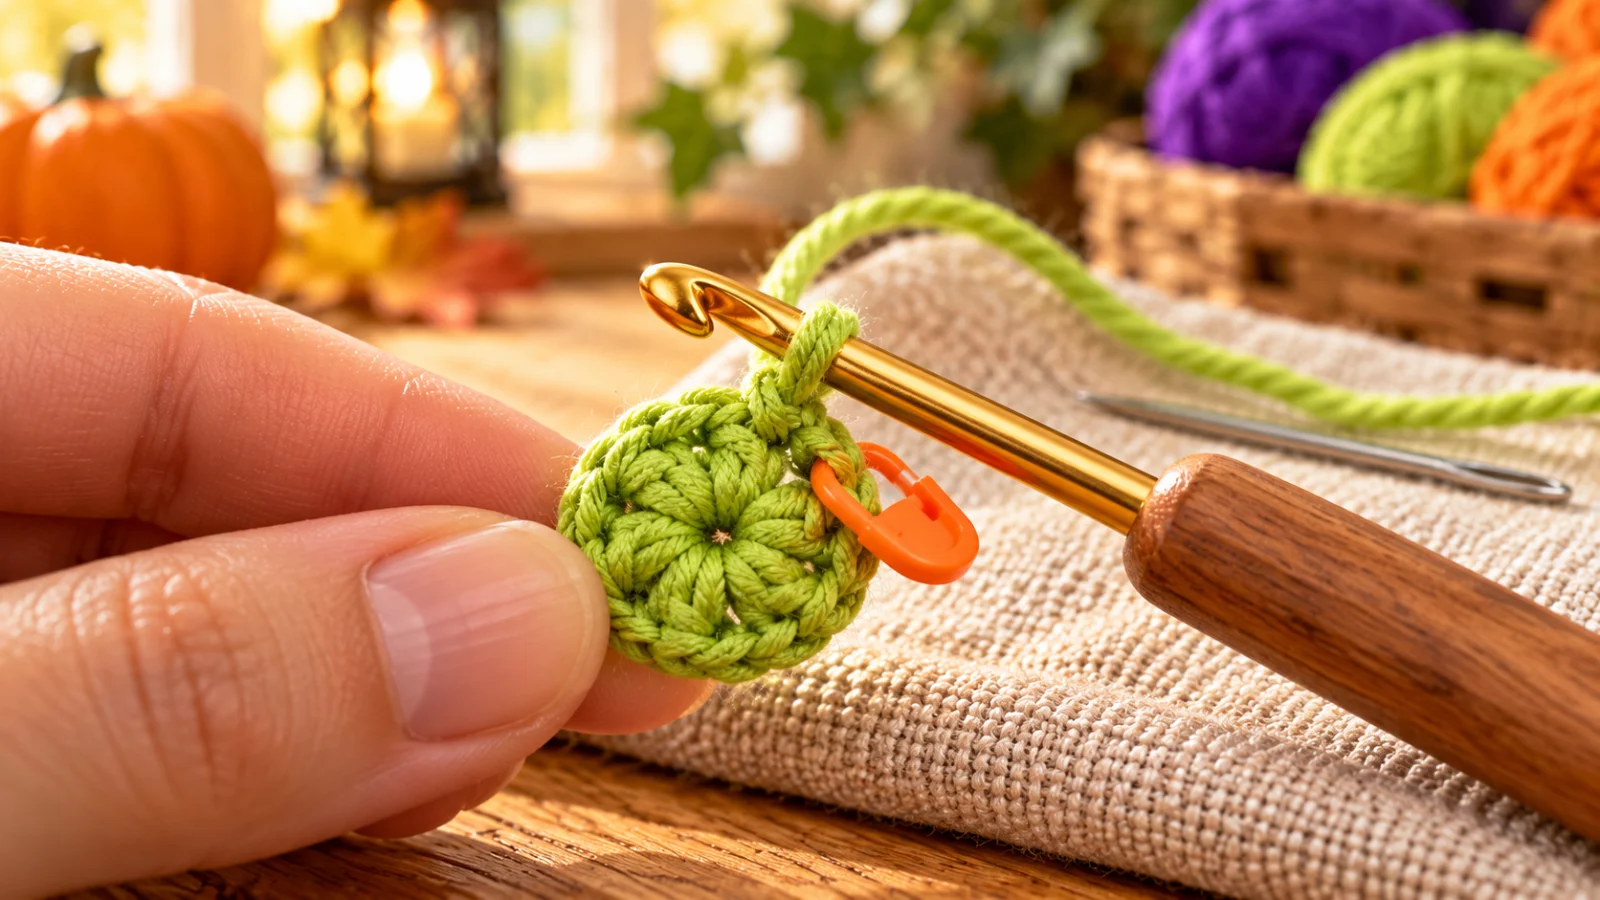
Both starts create the first round, and both are normally worked with six stitches. For the magic ring (MR), you wrap the yarn into an adjustable loop, work the first round into the loop while holding the tail, then pull the tail to close the center. A ring closes completely, but it can loosen later if the tail is not secured. After closing it, pull the tail a second time and weave it in to lock it.
For a chain start, chain 2 and work the first round into the second chain from the hook. It is easier to learn, but it may leave a small opening that you close with the tail at the end. Learn the magic ring because the result is tidier, but use the chain start until the ring stops slipping.
Shaping: how a flat circle becomes a rounded piece
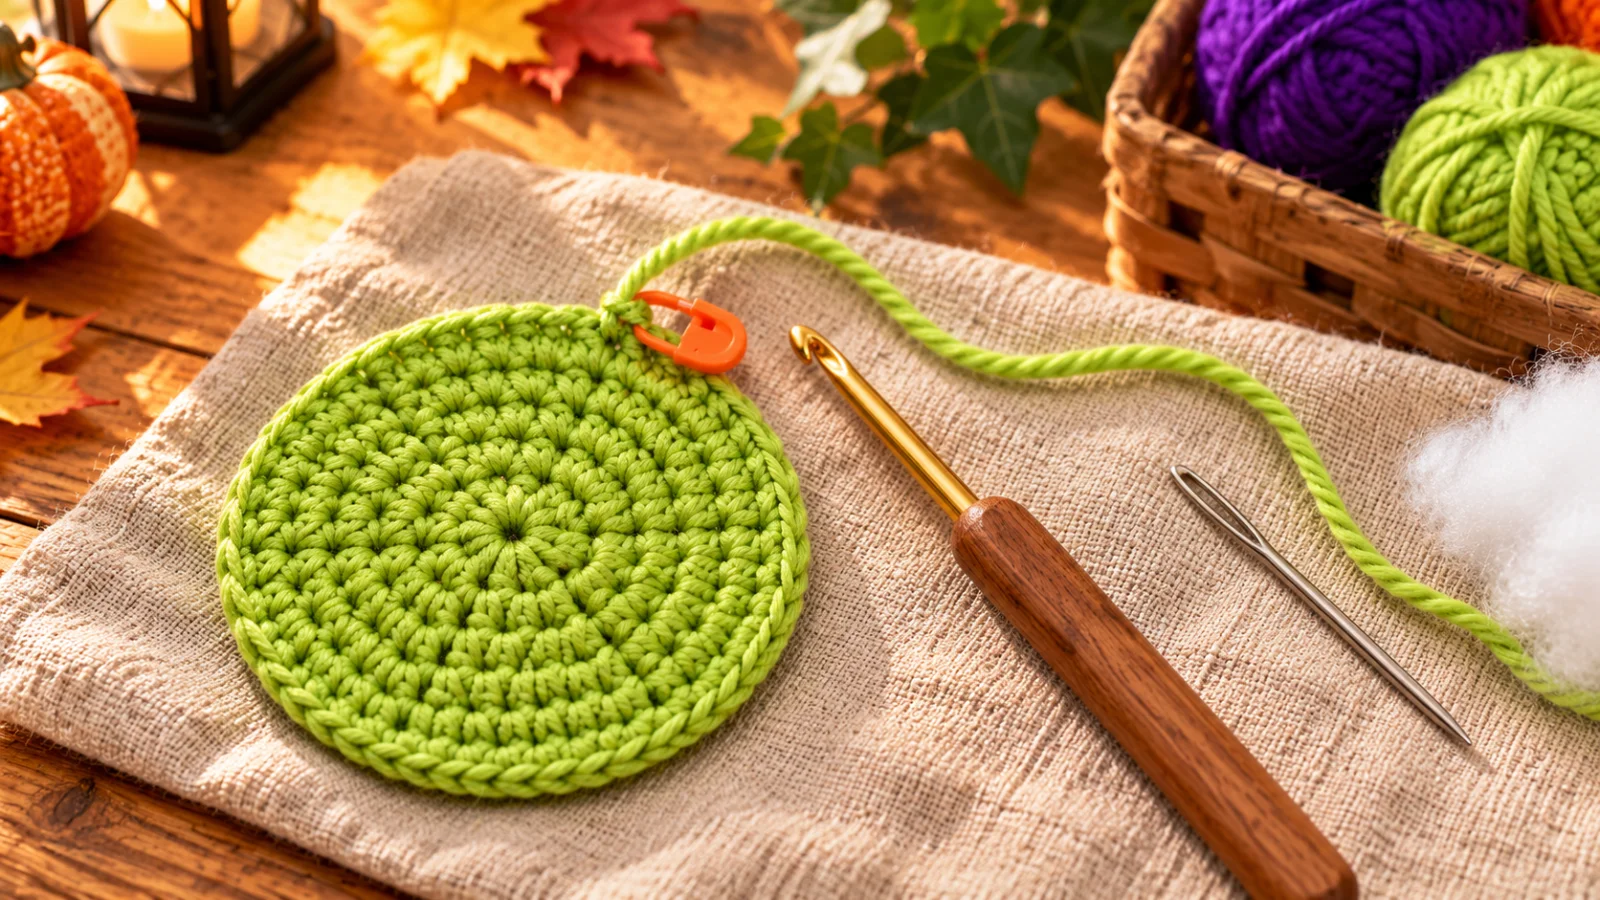
Shaping means adding stitches to widen, working even to go straight, and removing stitches to narrow. A flat circle in single crochet grows by the same number of stitches every round, and the increases move around the circle so they do not stack into points. The four rounds below show the principle. They are an illustration of the principle, not a complete pattern.
| Round | What you do | Stitches at the end |
|---|---|---|
| 1 | 6 sc in the magic ring | 6 |
| 2 | inc in every stitch | 12 |
| 3 | sc in the next st, inc in the next st; repeat around | 18 |
| 4 | sc in the next 2 sts, inc in the next st; repeat around | 24 |
Each round adds six stitches, and the plain stitches between the increases grow by one each time. Keeping to that pattern keeps the circle flat. Too few increases in a round make the edges curl upward like a cup, and too many make the edge ruffle. Lay the piece on a table: a circle that lies flat has the right count.
To turn the circle into a rounded form, stop increasing and work rounds with no increases. The piece now grows upward and the sides build. The number of these even rounds sets the height. Then decrease in rounds that mirror the increases, which pulls the top in.
The invisible decrease
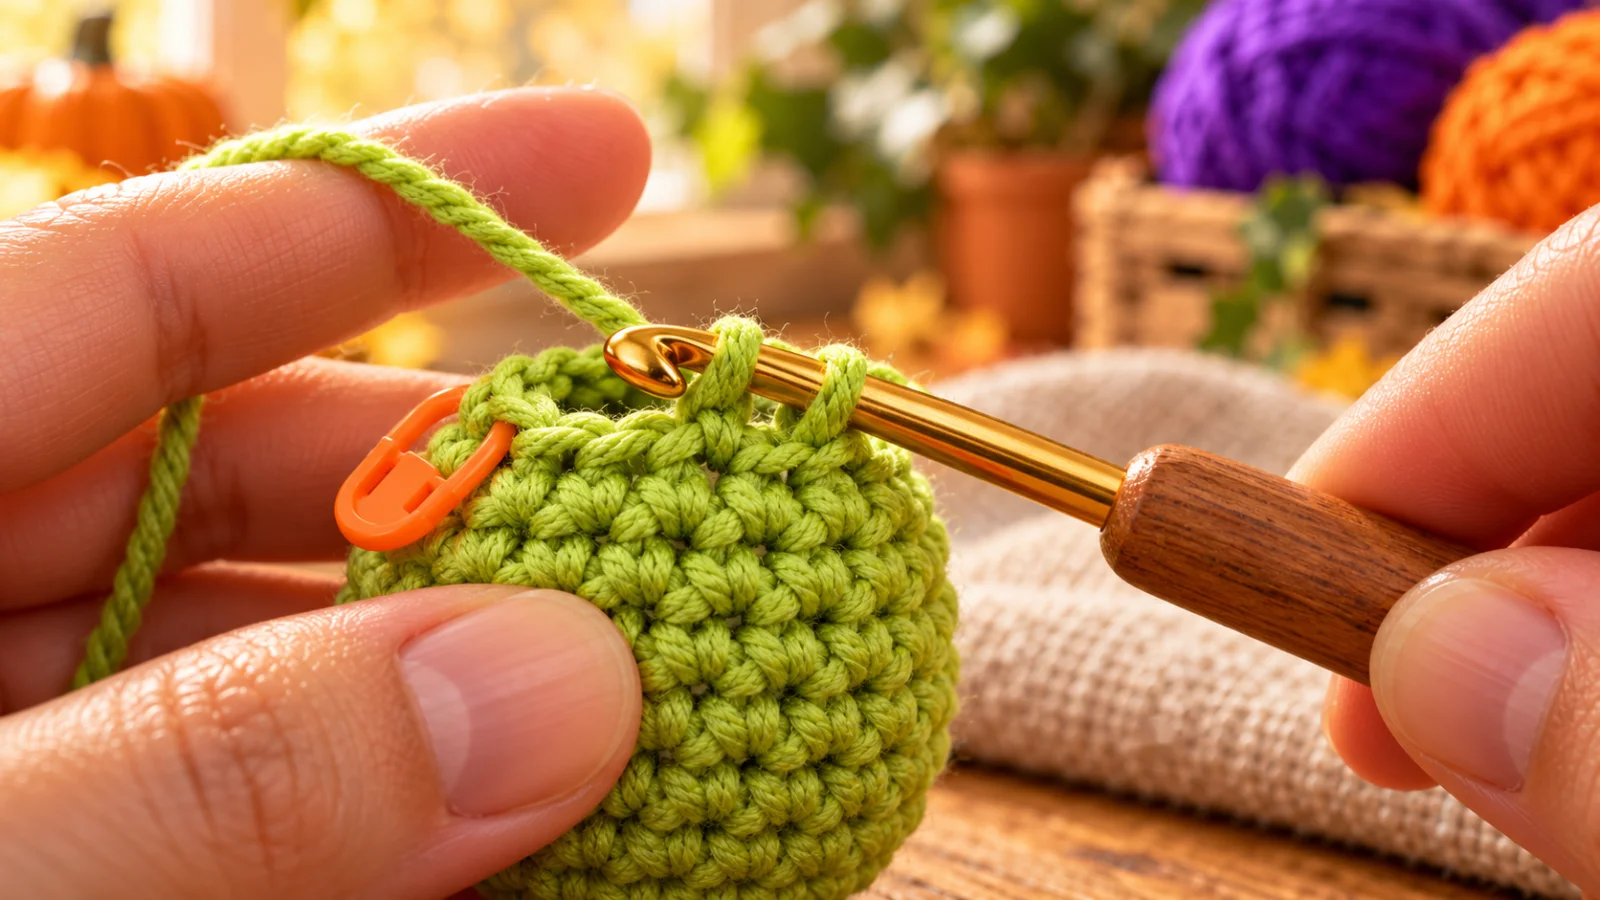
A standard sc2tog works through both loops of two stitches and leaves small gaps that can show the stuffing. The invisible decrease works only through the front loops (FLO), so the decrease looks like an ordinary stitch. Both turn two stitches into one, so the counts in a pattern do not change. Follow what your pattern calls for, and swap only if you are comfortable doing so.
- Insert the hook into the front loop only of the next stitch. Do not yarn over.
- Insert the hook into the front loop only of the stitch after it.
- Yarn over and pull through both front loops. You now have two loops on the hook.
- Yarn over and pull through both loops.
Stuffing and closing
Start stuffing when the opening is about to become too small to reach into with your fingers. Add fiberfill in small pieces and push each into the corners first. One big wad makes lumps. The piece should feel firm when squeezed without stretching the stitches apart. Soft stuffing makes a floppy piece, and overstuffing opens gaps that show the fiberfill.
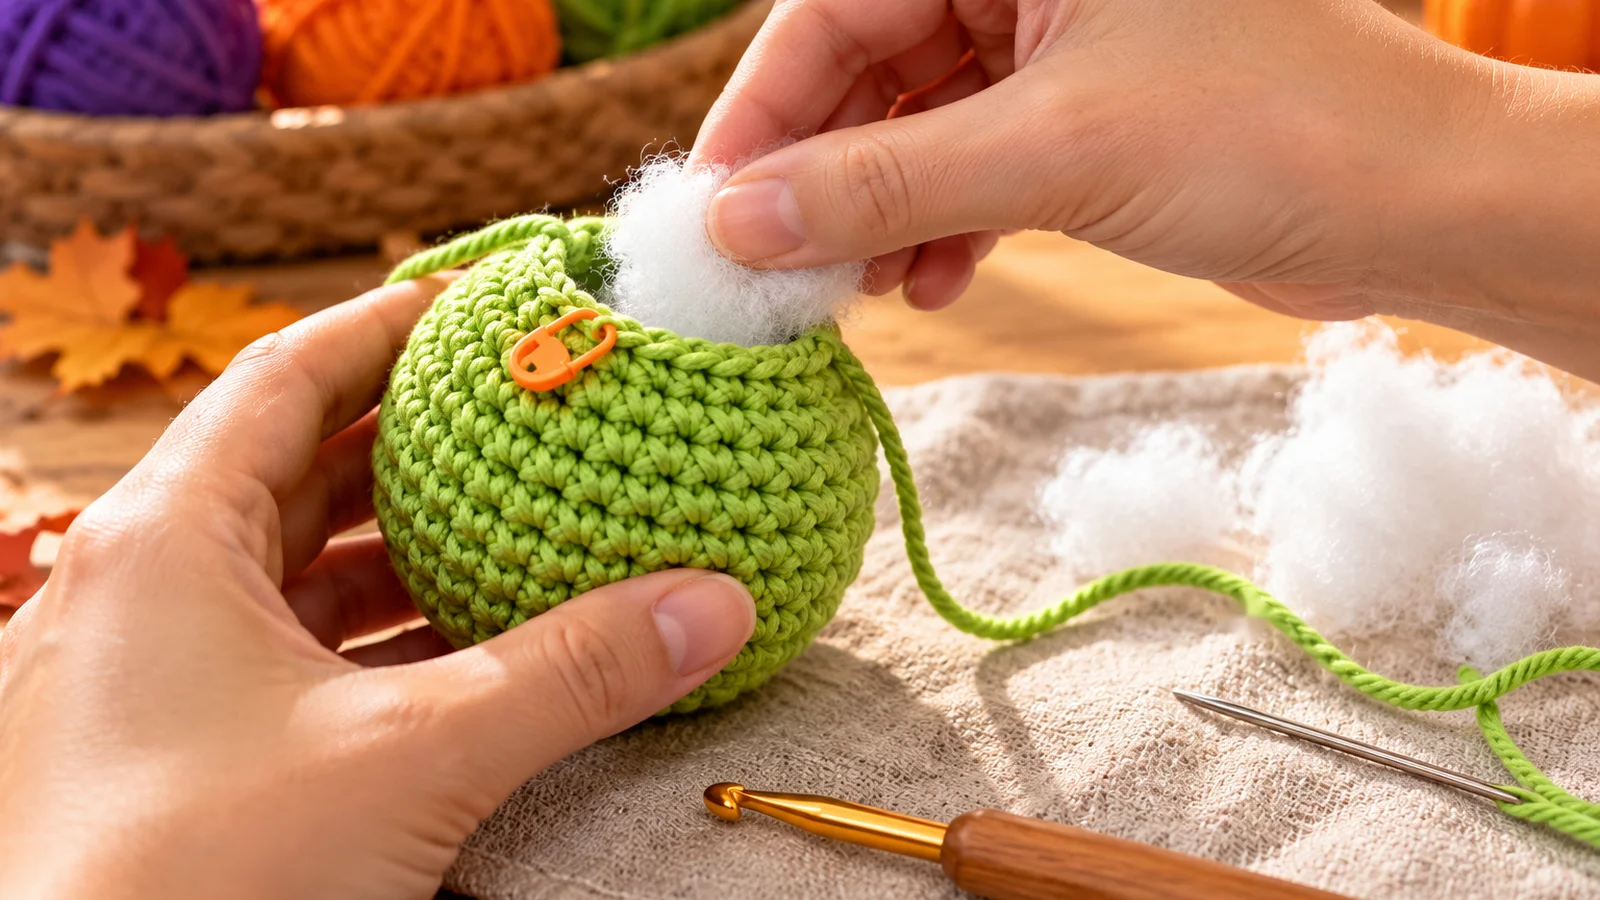
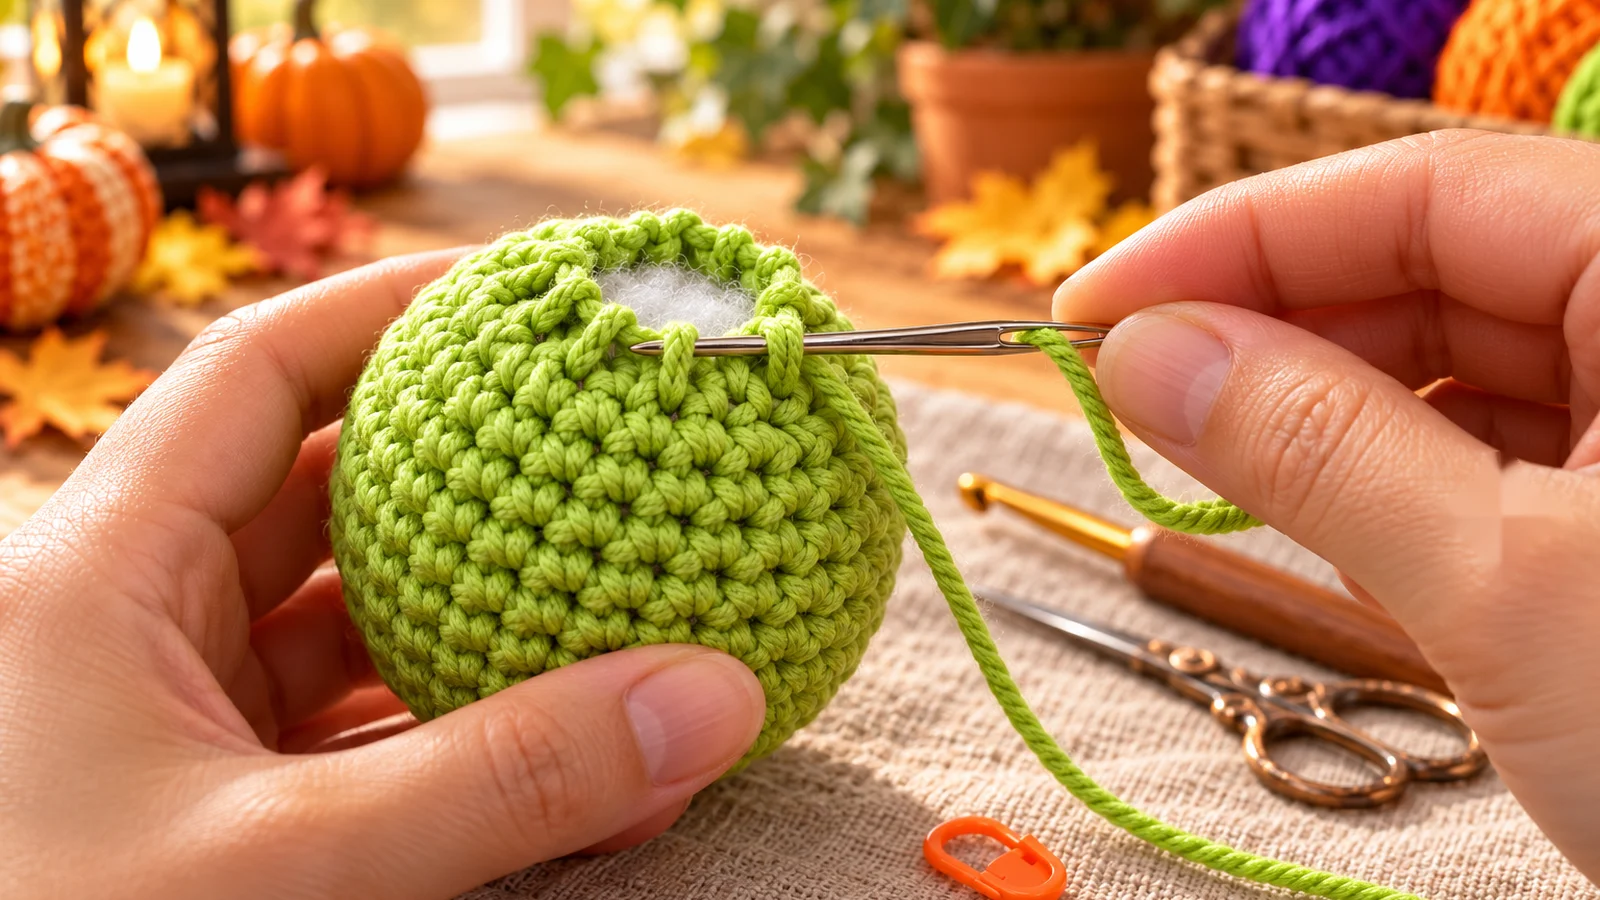
When only a few stitches are left, add the last bit of stuffing and cut the yarn, leaving a long tail. Thread it on the yarn needle and run it through the front loops of the final round. Pull it closed like a drawstring. Then pass the needle through the body, out somewhere away from the closure, pull gently, and snip close so the end retreats inside.
Eyes, features and assembly
Eyes are a topic of their own, so here is the short version. Safety eyes lock onto a post with a washer, so they go in before you close the piece. Embroidered eyes can be added afterward. A safety eye is still a small part, and no toy with small parts is safe for a baby or toddler. For a toy meant for a young child, embroidered features are the more cautious option, and the eye manufacturer’s age guidance is worth reading.
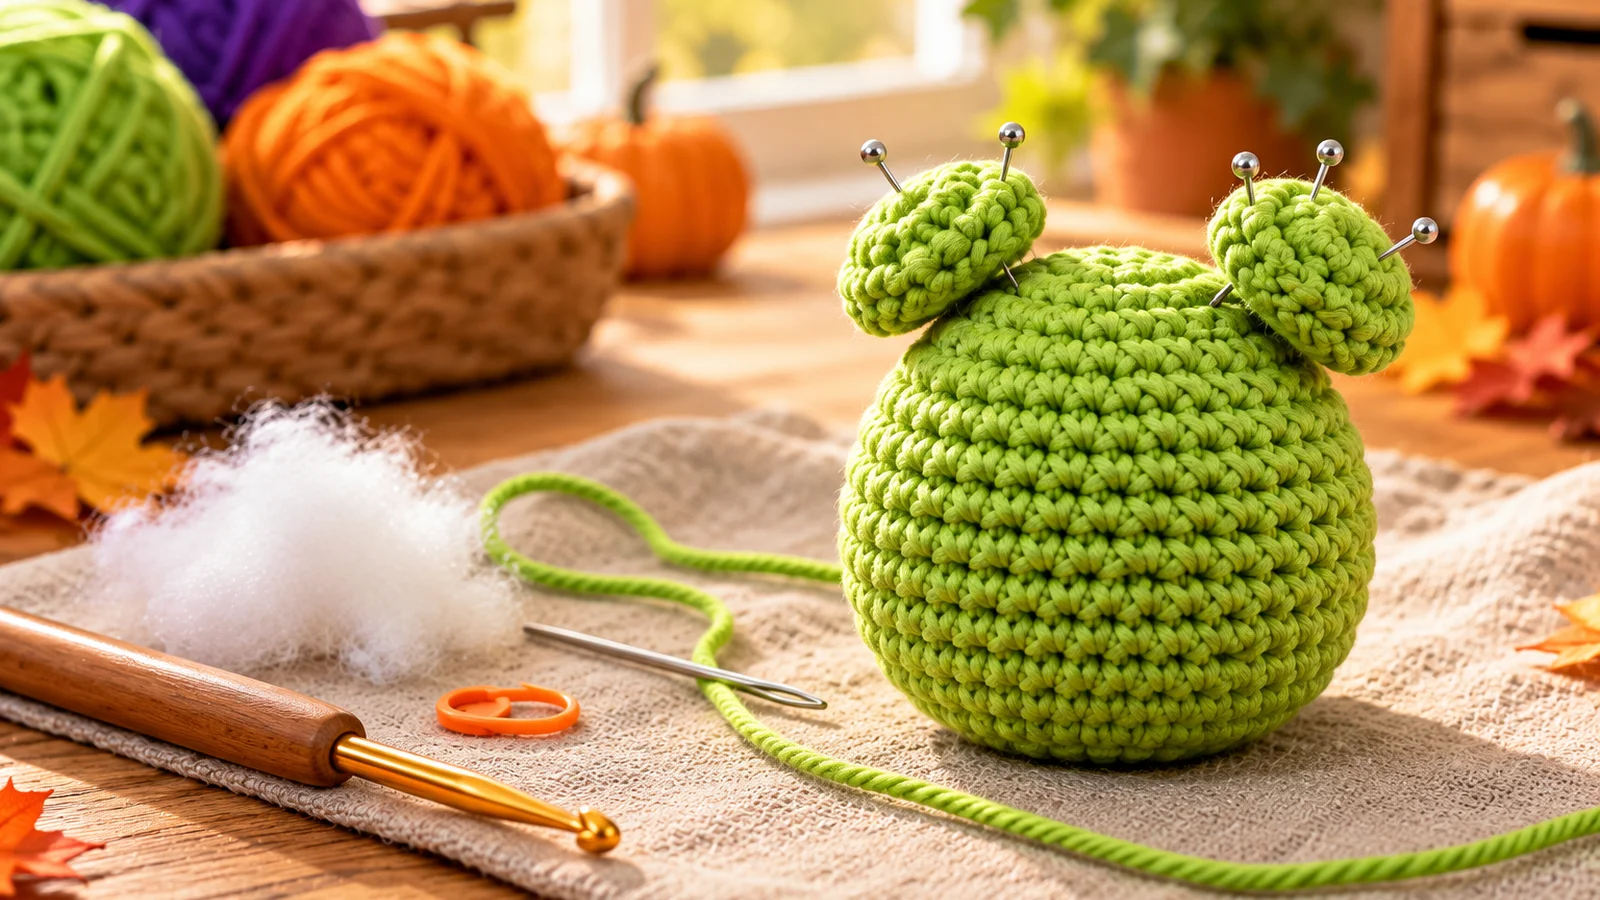
Separate parts go on last. Pin each one in position, then check the piece from the front, the back and both sides, because a part that looks level from the front can tilt in profile. Only then sew around the edge of the part’s last round with the yarn needle. Some designs avoid sewing by crocheting parts directly on, which is a separate method.
From a plain ball to a finished toy
For a first piece, make a plain ball in one smooth, light-colored yarn, with no face and no parts. It uses only the increase, even and decrease rounds, plus stuffing and closing, which are the skills every amigurumi piece depends on.
Add one new thing at a time after that:
- A second color. Work the last stitch of a round until two loops remain on the hook, then yarn over with the new color and pull it through both loops. The new color starts the next round at the marker.
- A small flat part. Work only rounds 1 and 2 from the table above (12 stitches) and leave a long tail. Sewn on, it becomes a round ear, a cheek or a patch.
- A tube for an arm, leg or tail. Work 6 sc in a magic ring, then work even rounds of 6 sc until it is as long as you want. Stuff it lightly and leave a long tail for sewing.
- Assembly. Pin the part, check it from every side, then sew it on as described above.
Keep small, hard or wire parts, such as safety eyes, buttons and pipe cleaners, off any toy meant for a baby or toddler. Use embroidered or crocheted details instead.
Gauge, size and changing yarn
Amigurumi has no standard size. Finished size depends on yarn weight, hook size, your tension and the number of rounds. A piece worked in thicker yarn or with a larger hook comes out larger, and a piece in thinner yarn or with a smaller hook comes out smaller.
Nothing has to fit a body, so gauge is less critical than for a garment, but it still controls density. Looser stitches give a larger piece with more stuffing showing. Tighter stitches give a smaller, stiffer piece that is harder to work. Changing yarn weight or hook size changes every dimension together, and it also changes how dense the fabric is, so check that a large piece still looks closed before you fill it.
Troubleshooting by symptom
- Stuffing shows through gaps. Usually the hook is too large for the yarn, the tension is loose, or the stuffing was packed hard enough to stretch the stitches. Try a smaller hook and add stuffing in smaller pieces.
- Lost round start or drifting count. Count at the end of every round against the number in parentheses. If it is off, recount once, then undo back to the last correct round.
- A hole at the center. With a ring, pull the tail firmly, then again, and weave it in. With a chain start, sew the hole shut with the tail. At the closed top, run the tail through the front loops again and pull harder.
- Cupping or ruffling. Compare your last round with the count in parentheses and undo to the round where the count first differs.
- A lumpy shape. Uneven stuffing, uneven tension, or both. Squeeze the piece before closing while you can still reach inside.
- A visible jog or seam line. A spiral has a slight step where rounds meet, and joined rounds leave a seam. Both are normal.
- Stitches too tight to enter. Tight is the goal, strain is not. Find the two loops before inserting and loosen your grip slightly.
- Lopsided parts. Pin first, check from several angles, then sew.
- Stuffing shifts or flattens. It was probably added in one wad, or too little was used. Firm with no stretched stitches is the target.
Finishing and care
Weave in every yarn end so it disappears into the stuffing, then tug each part and feature gently to check it is secure. For washing, the yarn label decides. The fiberfill, plastic eyes, glue or wire in some designs all limit what a finished piece can tolerate. Spot-clean a stuffed piece with eyes or wire, and expect a wet stuffed piece to dry slowly.
Questions beginners ask
What does amigurumi mean, and is it only stuffed animals?
The word comes from Japanese words for crocheted or knitted and for a stuffed doll. Animals are common, but the same method makes dolls, characters and small objects.
How much stuffing do I need?
The amount depends on your yarn, hook and piece. Add stuffing until the piece is firm without stretching the stitches.
Can I use chunky yarn?
Yes. Chunky yarn with a larger hook makes the same pattern larger, but check that the fabric still looks closed.

Last updated . Found something out of date? Let us know.